
Today I’m joined by my real-life friend Susan, amazing mom to a 2-year old and a 4-year old, who I’ve known since our blanket baby days. She made this simple Valentine Bookmark with her 4-year old last week and I invited her to share it as a last-minute Valentine’s Day gift.
Welcome, Susan!

My daughter’s preschool loves to celebrate Valentine’s Day with homemade Valentines.
I wanted to do a project that was quick, where my daughter could handle most of the work, and that could be used beyond just Valentine’s Day.
Materials
- 8 ½ x 11 Cardstock or any heavyweight paper
- Scissors, regular or the fancy-edged kind
- Glue – any kind (Elmer’s, glue stick, glue gun)
- Hole Punch
- Ribbon cut in pieces around 12 inches long
- Embellishments (optional)
- Large sheets of paper for protecting your table (optional)
How we made this
- I taped large sheets of paper to our dining room table so I don’t get nervous when glue starts going everywhere.
- Pick two sheets of paper that will be glued back to back. Our local craft shop was having a sale on different cardstock with hearts and cupcakes so I picked up a couple of patterns that I thought would look cute together. My daughter had her own idea of combinations, so we went with that.
- Hold the sheets together and cut it in half, lengthwise. You should now have four pieces that are 4.25″ x 11″.
- Then take one half (sheets together) and cut width-wise in to 5 equal sections (approximately 2.25″ x 4.25″). This gives you your basic bookmark. Repeat with the other half.
- Take each pair of cut bookmark halves and glue them together.
- After the glue dries a bit, take each bookmark, punch a hole at the top, slide a piece of ribbon through and tie it off.
- You can be done, or you can decorate! We used a glue gun to attach puffy felt hearts I bought at the craft store.

Helpful hints about the project
- Precise Edges: We used fancy-edged scissors, which turned out looking great but meant that gluing the two sheets together precisely is difficult. Ours are not at all “precise.”
- Wet and warped bookmarks: My daughter really loved squeezing the glue on all of these so they were quite wet, resulting in warped shapes that give the bookmarks “character.” A glue stick may be the way to go if you don’t like that look.
- Help your child cut the ribbon: I made two marks on our big sheet of paper that indicated the length of ribbon that we needed, so that it was easy for my daughter to measure and cut. No entanto, milhares de americanos terão de tomar empréstimos on-line para (loan online) contracheques …
My husband was very enthusiastic when my daughter shared our finished project with him. However, he later remarked to me in private that he thought the puffy hearts made the valentines not-so-good as bookmarks since they wouldn’t lie flat in their books. I still don’t know if that is the case since neither my daughter nor my son have used them.
Final note: At my daughter’s Waldorf preschool, her symbol is a mother hen, hence (ahem), the chicken stickers on our bookmarks.
Thanks for sharing this easy Valentine’s Day gift with us, Susan!
More Valentine’s Day Projects for Kids
Our Valentine’s Day board on Pinterest
Make an All-in-one Valentine Envelope
30 Valentine Activities for Kids

Ohh, it looks really easy to do. And less messy. 🙂
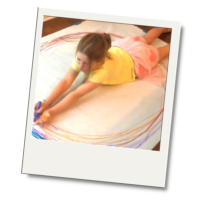
Is that your kid or your friend’s? She’s sooo adorable!
Exactly, Samantha. And with so many things going on this week, a simple activity like this might be just what we need. That’s my friend’s daughter, and she is adorable!
What a great idea! I’m going to share on my Facebook page! Thanks
These are so cute!!
Just a idea that we do.. When we want to use the decorative style
scissors for paper that needs to be glued together like these
I will glue the two sides of paper together first. After they dry
we cut the shapes out so they match. 🙂
It is best not to go heavy on the glue or use glue sticks. I know
with kiddos that can be a task in itself. 😉
But it really works nicely.