
Maybe you’ve collected a starter kit of art supplies, and now wonder about the best ways to store these supplies.
There are so many ways to organize art supplies, and this will differ depending on your space possibilities, how many supplies you have, and aesthetic preferences.
Instead of overwhelming you with the bazillion options from our favorite organizing stores, I want to keep this simple and start you off with one key idea.
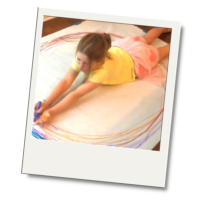
⭐️ If your child has easy access to materials, they are more likely to create.
Self-serve, Child-led Art Area
We want our kids to create, that’s the goal! If materials are at their fingertips, we’ll have a better shot at this.
So, the first thing I want you to do is set up a station with self-serve art supplies that your child can access when ideas strike.
The Child-led, Self-serve Art Cart
The art cart will help you organize the most frequently used art supplies.
If you don’t have an art cart, that’s okay! If you have a few shelves or a cabinet, the idea is the same.
The small difference with the art cart is it gives you the option of rolling it up right next to wherever your children decides to create.
What’s on the Art Cart?
I’ll outline what goes onto a Basic Preschool Art Cart, and share additional ideas for other creative cart uses.
Our cart has three shelves and it’s helpful to group materials by their likeness for easy finding and easy clean-up.
These are the three categories of materials that go onto the preschool art cart: Drawing and cutting tools, Attaching tools, Treasures
You can fill your cart with exactly what you see here, or substitute some of the items for things that are used more frequently by you or your child. The materials on our cart reflect an interest in drawing and 2-D art. If your child is invested in 3-D building, make substitutions accordingly.
While you won’t see building, playdough, or paint supplies on our cart, we do store these other art-making supplies nearby.
This post may include affiliate links.

Build an Art Cart for Preschool Children
Top Shelf: Drawing and Cutting Tools
- Washable Markers
- Pencils and Colored Pencils
- Crayons
- Scissors
- Paintbrushes
Middle Shelf: Attaching Tools
- Tape: Colorful washi tapes, colored masking tape, and clear tape
- Glue: White glue, colored glue, and glue sticks
- String: baker’s twine, cotton twine
- Stapler
Bottom shelf: Treasures
- Stickers
- Pom-poms
- Sequins
- Wiggly eyes
- Buttons
- Stickers: Color coding labels
- Sketchbooks
Other Art Cart Ideas
Some people like having a few carts for different purposes. Others like storing all their supplies in a pantry and then building out carts to meet the needs of a particular interest or focus.
Here are a few other ways you can build out an art cart…
Dough Tools: Sculpting Cart
- Play dough
- Play dough tools
- Air dry clay
- Mini muffin pan
- Spoons and bowl
Building Tools: Tinkering Cart
- Low-heat glue gun
- Recyclables
- Broken toys and appliances
- Hammer
- Tacks
- Goggles
- Duct Tape
- Scissors
- Screwdriver
Paint Tools: Painter’s Cart
- Tempera Paint
- Watercolors
- Paintbrushes
- Rags
- Water containers
- Apron
- Paper
How the Art Cart Works
The art cart is self-service for when a child is ready to create.
They can find what they need, remove it from the cart, and then put it back in its place when they’re done.
These are some of the projects that might be inspired by materials on an Art Cart:

- Sequins, beads, and buttons stuck into dough
- Homemade crown with Sharpies, glue stick, and scissors
- Office stickers and Tape in paper frames
- Paper doll with clear tape, stickers, and permanent marker
Where to buy an Art Cart
Ikea: The Raskog Kitchen Cart is fantastic. Like anything IKEA, you have to assemble it yourself, but it’s not a difficult assembly. The cart is sturdy (made of steel), the casters are solid. Comes in 3 colors.
Amazon: Heavy duty 3-tier Utility Rolling Cart. Equally fantastic, this cart comes in 5 colors.

See the Art Cart in Action here: A peek into our maker space
Organize a Child-led Art Space
Learn more about organizing a child-led art space here.


This is cute! Thanks for sharing. 🙂
Thank you, Jenny 🙂
What an awesome idea. We’ve been struggling to keep art supplies organized and I’m reluctant to get rid of too much for the sake of having a spotless (who am I kidding) play area. I can see my 1 year old going crazy with the cart, but I’m putting this on the back burner to come back to in a few months maybe. Or do you have an idea of how I could make this crazy toddler friendly?
Thanks, Iluska! We didn’t set this up until my kids were 3 and 5, and before that we stored materials in simple buckets on a shelf, which might be a better option for you. Here’s the layout: https://tinkerlab.com/organize-a-self-serve-creative-zone/
I LOVE this idea!! It will make keeping organized so much fun, I can’t wait to try it!!
I have this exact cart (that I got in the “as is” dept of Ikea already put together and with a scratch on it…(though I’ll have to take their word for it since I totally can’t find it)….SCORE!! This looks great and looks very functional. Thanks for the inspiration!
When that IKEA cart first came out, this is the exact use I had in mind! I haven’t gotten around to putting an art cart together yet, but this post is exactly what I needed to get inspired. I’ve been pulling my hair out with markers and crayons strewn everywhere. Thanks for the inspo!
I’ve had the rainbow carts with the drawers. I don’t recommend them, the drawers fall out easily. But I’m headed to IKEA soon!
Yikes, that’s good to know. The IKEA cart is incredibly sturdy and I highly recommend it.
How did you make the masking tape holder?
Hi Nena,
It’s made from tubes and connectors from our “Fort Magic” kit. You could make something similar from PVC pipe and connectors, although be cautious since PVC is not the safest thing to expose kids to.
Cheers,
Rachelle
Very cool ideas! Thanks for sharing!!!
Hi! I found your wonderful blog through the Artful Parent. I love your art cart and I’m in the process of setting up something similar. Where did you purchase the little buckets to hold crayons, markers, etc? Thank you so much for sharing this—I love how organized, accessible and inviting it is!
On a unrelated note, what do you do with all of your children’s art work?? I try to display my sons’ pieces for a bit and then keep the favorites in a plastic bin for each of them under a bed, while recycling the rest. We have a small house with limited storage and living space, so displaying and keeping their sculptures/play-doh and clay creations is challenging….
Hi Kary,
I’m so glad that you found me. I found the buckets in the dollar section at Target, and I still see them there (with a slightly different look) occasionally. Keep your eye out! As for my kids’ art, I only display a very small bit of it and the rest goes into scrapbooks or a big bin, like you, where we keep milestone pieces. Three dimensional pieces are kept for a short while and then usually photographed and then recycled. My kids are completely fine with this and aren’t too attached to keeping everything around for very long I hope that helps!
Rachelle
[…] to access. Other people swear by their ikea art carts! (You can find some tips on setting one up here) Craft supplies can get really messy, really quickly, so the the important thing is just to be […]
[…] How to Set up and Art Cart […]
[…] Art Cart Ideas from Tinkerlab – I read her book and was inspired to create my own art cart like the one you see her. […]
[…] Image Source: Tinkerlab […]
[…] an IKEA cart for art supplies and other misc goodies such as […]
[…] Found From Tinker Lab […]
[…] Source link […]
thanks for sharing a great article. This is very helpful and relevant for us.
Amazing and what a article
Thanks for this wonderful article
OMG , Well Written
Super fun idea! We have the cart – just need the bins now 🙂
What a great idea. I will try this with my young nephew. A perfect autumn activity.
I will do this with my kids!