
Do you remember Shrinky Dinks? I loved loved loved these as a child, but I wasn’t sure if my 2.5 year old would be ready for them yet. We happened to find ourselves at a Hanukah party in December where a bunch of craft tables were set up, and my child gravitated to the Shrinky Dink table. Why, I’m not sure, but the mountain of Sharpie markers may have had something to do with it. We had a really good conversation about how plastic melts with heat (in this case, in a hot toaster oven), and I’m impressed that my daughter can now articulate a wide range of melting things including snowmen, ice cream cones, and now shrinky dinks!

Materials
- Shrinky Dink Refill kit – I ordered these from Amazon
- Sharpies in a variety of colors. The Shrinky Dink company also recommends Prisma Color pencils or non-water based crayons. We used Crayola Twistables and Crayola washable markers for this project.
- Oven or Toaster Oven
- Hole Punch (optional)
- Scissors (optional)

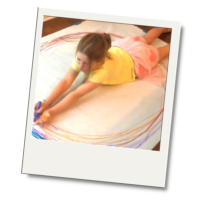
I cut one of the sheets in half, and my daughter drew all over them with Sharpies, markers, and crayons.

We’ve been revving up for Valentine’s Day, so when a request for a heart shape came in I was ready! I made a little heart template on green paper, traced the shape onto the plastic, and then cut it out. You can get a sense of the scale reduction in the picture above. I punched a hole near the top, so we could add these to a keyring or necklace later on.

Heat the oven to 325, then bake! The plastic curls as it heats up, and it’s really fun to watch. If there’s ever a time to use the oven light, this is it! This step takes less than 30 seconds, so watch it closely.

And there you have it…Shrinky Dinks just in time for Valentine’s Day.
Resources
- The Shrinky Dink company put this handy little idea and cheat sheet together
- Our friend Chelsea shares these instructions from Curbly for making your own shrinky plastic pictures from #6 plastic (polystyrene). It’s brilliant: resourceful, inexpensive, and recyclable! We will most definitely be trying this out.

Love non-candy valentine ideas for the toddlers!
we love candy, but i have to agree!
Hi,
I just wanted to make sure that I was reading correctly. That crayola washable markers will work just as well as Sharpies? I am looking to do this with a bunch of people and don’t have a lot of money to spend on sharpies.
Thanks,
Jen
very fun… we love shrinky dinks… now i know what to buy to make our valentines.
enjoy, and let us know how it goes! oh, and send my niece and nephew big hugs from us 🙂
these are so cool! the rectangular one on the left is particularly beautiful. i want to make them! no kids around, though i think i know some adults who act like toddlers… 🙂
I must know the same adults as you! And, if it’s not apparent, i enjoyed this project too! 🙂
Wow – we just got through making our version of “shrinky dinks” today! Although, ours weren’t heart shaped. My kids are ages 6, 9 and 12. We made a variation on a “shrinky dink” craft from Dollar Store Crafts, where it showed how to make a plastic “washer” necklace from a red #6 plastic party cup. This was a very cute craft, but I was having to use a box cutter to cut the hole in the bottom, and slice the cup in half.
Instead, we used transparent #6 plastic 5 oz cups, did not cut a hole in the bottom, and I punched a hole about 1.5 inches from the top with a standard hole punch. The hole squishes up a bit, but is still large enough to get a thin ribbon or yarn through. We then decorated, placed on a parchment paper-lined cookie sheet, and baked in a 250 degree oven for about 20-30 seconds. The finished product is a thicker plastic than the original cup and turns out to be a white disc that is pretty as a necklace or as a suncatcher.
Maria! Thanks for sharing the clear directions for this very workable alternative for folks who want to use everyday materials to make shrink plastic. We have to try it too!!
These turned out great! I like to use #6 plastic (mostly clear food containers) and punch a circle and have the kids write their name and date. Then we attached the shrunk nametag to their xmas ornaments so we can tell them apart in years to come.
Such a good idea for notating ornaments, Deanan! Thanks for sharing.
This means you will be saving a lot of time and energy to do
other things especially if you are a busy stay at home mother.
Cuba is also home to even simpler snacks and light treats.
Practically every kind of pizza topping has been tried
by pizza chefs, some of those toppings being peanut butter and jelly, bacon and eggs, and mashed potatoes, some of which have worked out fantastically,
while some have not done so good.
For example, you can have face-to-face counseling, which generally is the best, counseling
over the phone and even using the internet. But as fast as
you try to run, the suffering follows close by – as the wheel of a cart follows the hoof
of the ox – to use a favorite analogy of the Buddha. If the program
you are looking at does not have a residency requirement,
it is likely that it involves some sort of practical
training in the field with a licensed counselor.
[…] made Shrinky Dinks valentines like this post from TinkerLab. […]