Snap Circuits Review
If you’re in the market for a toy for a child who likes to build things, tinker, or is curious about how things work, Snap Circuits SC-300 tops my list. We’ve had this toy for a year and I just bought a BUNCH of them for friends because I like it so much. This is not a sponsored post — i’m just a happy customer who wants to spread the word. (Note: This post does contain affiliate links)
With Snap Circuits, those of us with no electronics background or understanding can easily build a light switch that works or a doorbell that rings. With a clever system of snaps that safely connect electronic components together, children will learn the basics of electricity and how to build all kinds of circuits.
The instruction manual is easy to understand, and I noticed that after we were halfway through our first project together, my five-year old figured out how to finish the assembly on her own. While it’s designed for children ages eight and up, my three and five year olds enjoy using it with adult collaboration, and I know it’s a toy that they’ll grow with.
What kind of toys should I buy?
When it comes to buying toys for my children, there are three questions that I like to ask:
- Is it a learning tool? With Snap Circuits, children will learn about electronics and how to build a variety of circuits.
- Is it engaging and fun? If children are curious about making things and how things work, the process and rewards will be fun and motivating.
- Is it open-ended? While many of the projects have a specific outcome in mind, many of them have multiple end-points. The example I’ll share today is an example of this.
In case you’re wondering, here are some curiosity and creativity-building toys that we’re also crazy about:
- Blocks. We love this set from Melissa and Doug
- Obstacles Game
- Marble Runs
- Spielgaben
- Stomp Rocket
And now, on to the project…
Build a DIY Spin Art Machine with Snap Circuits
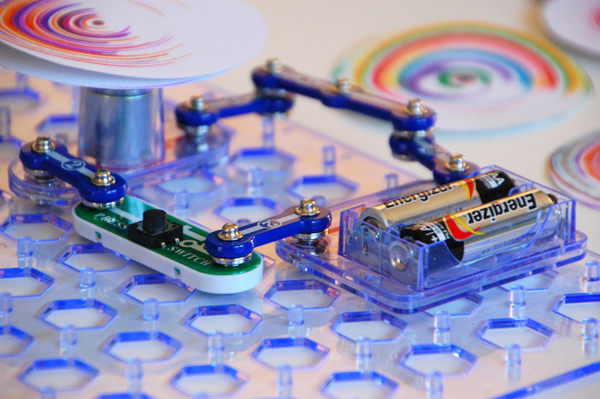
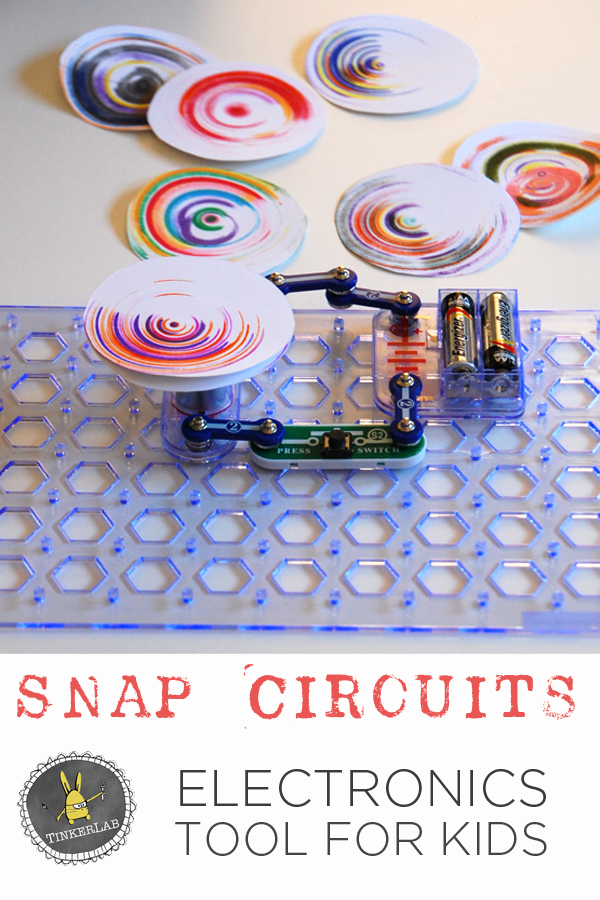
Making their own spin art machine captured my kids imaginations, and we assembled it in about ten minutes. The toy comes with a grid that’s fitted with little prongs. The electronic pieces then snap right onto those prongs, which hold them in place. Putting these together will remind you of playing with Legos. In fact, if your child enjoys Legos, these might be a natural extension for you.
Snap Circuits doesn’t come with batteries, so if you buy this as a gift it’s something to keep in mind. If you don’t want to mess with replacing batteries over time, there’s a battery eliminator that people seem to be very satisfied with.
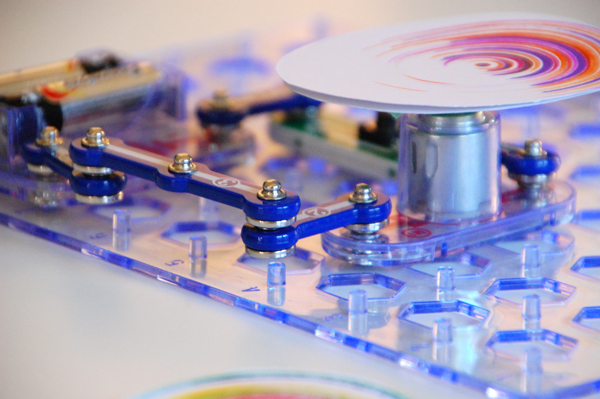
One of the components in this circuit is a small motor, and we were instructed to attach a stiff, circular paper base to the motor with some tape. Next, with a piece of double-stick tape we added a second circle of paper on top of the first one.
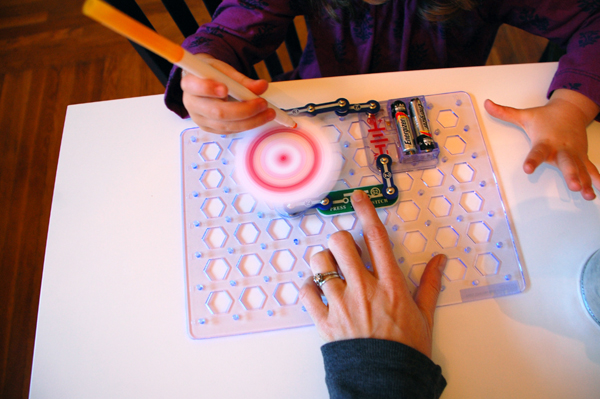
There a small on/off button on one side, so while one of us pushed the button, someone else got to use markers to add color to the spin art.
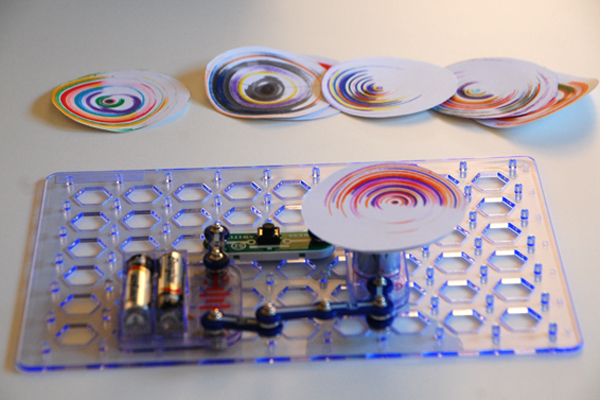
We struggled a bit with centering our circle, but no one seemed to mind our off-center designs. My 3-year old is obsessed with rainbows at the moment, and she enjoyed documenting her rainbow colors in just the right order.
I think they came out beautifully!
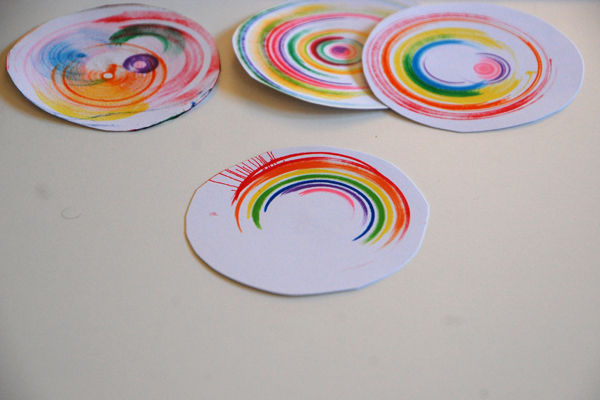
After we played with it for a full hour, I was ready to disassemble it and store it away. But my kids saw this as a new toy, and wanted to keep it out. I complied, of course, and we made spin art for days! After two weeks we just broke it apart, and we’re now ready for another electronics challenge.


Woahhhhhhh, that looks amazing! I wish I hadn’t just finished Christmas shopping. But… I will add this to my list of cool things to buy in January to help get through the long winter. 🙂
I know, Jeanette — I should have posted this sooner! I imagine it will keep your little ones entertained for many years to come, regardless of the season 🙂
We were planning on purchasing the beginner kit, the one with 100 pieces. Do you recommend the 300 pieces over that? Our daughter is 6, and will be 7 in February. For the spin art project, is that included in the booklet that comes with the kit? It looks so fun!
Hi Heather,
When I bought our kit, I don’t remember the 100 piece set being an option, but that’s the set I bought for our little friends this year. It looks like it comes with the motor, so I would say “yes,” this will work for you!
Rachelle
Thanks! 🙂
I just love this so much!!!!!!!!!!
A million and one thanks, Megan 🙂
We bought this for my daughter for Christmas and have done the spin art project. We love it and can’t wait to make more snap circuit projects! 🙂
Hi Rachelle,
We have Snap Circuits and love it. We got a spin it yourself Spin Art Machine for Xmas and have been using it tons. But, this is truly great! We will have to start investigations as soon as possible. Thanks for the great idea!
WE bought this for Christmas. and our boys love it. Even our just barely turned 6 year old makes things with out using the instruction book! He has figured out how the connections work and what he wants to do with it and how to make it happen! I think that is amazing! What a great learning toy! I love your idea for the spin art. We will be trying that this week.
We bought these sets for our boys for Christmas and this has been our favorite project so far! Sooo FUN!
This is such a great idea! We need to take out our Snap Circuits.
Thanks so much! Every time we take ours out, we struggle to get past this very popular project 🙂
Awesome use of Snap Circuits. Using markers seem a lot less messy than the spin art paint. I’ll try it with my 5 y/o this weekend. He’ll love it. We might try it with the on/off switch instead of the button.
We’ve done it with both now – the on/off switch gives the child full control, which is really nice.
We’re so close to having fun with this one. But how do we stop the spinning part from flying off the motor as soon as we touch it with the marker? I can’t figure out what we’re doing wrong. Or maybe the element of danger is part of the fun!?
Ha! I suppose that danger could be part of the fun 🙂 The same thing happened to us the other day. Tape the spinner to the motor (as well as you can — it’s tricky) and it should hold.
My daughter is having a great time with this project . Instead of taping the paper to the motor we just used poster putty and they are easy to press on and pull off. Thanks for the great idea!
That’s a fantastic idea, Hilery. We do this project so often so I’m sure we’ll have a chance to try this out soon. Thank you!
Since it does not require any wires, it is especially valuable to people who
live in leased homes and apartments. The repair of the lock itself (apart from the occasional cleaning or oiling done by you) should be done by a professional.
All the products on the site come with a manufacturer’s warranty and a 30 day money back offer, so
if you do not like the doorbell that you buy, you can simply return it and get your money back, no questions asked.
It’s going to be ending of mine day, except before end I am reading this impressive piece
of writing to increase my experience.
Add the tape to the outline. If your child takes more than the 12 seconds my daughter did with this step you can talk about the different lengths of tape or dive into what mummies really are. I didn’t get into that with my 3 year old but if she was a little older I think it would have fascinated her.
[…] Build a DIY spin art machine with Snap Circuits on Tinkerlab […]
[…] Build a DIY spin art machine with Snap Circuits on Tinkerlab […]