Have you ever wanted a light table, and wondered if there was an easy way to build a DIY light table yourself? Well, this easy DIY light table could be your answer! Once I figured out which materials to use, the whole thing took about 10 minutes to assemble.
Note: This light table is designed to hold salt or sand in the top layer. For a flat-top light table, see this tutorial: Homemade Easy Low-cost Light Table

*Note: This post contains Amazon affiliate links for your convenience.

After seeing the beautiful glow that illuminated from the easy light table at Teach Preschool and the pop-out pictures created in salt over at Child Central Station, I’ve been on the hunt for some DIY materials to make my own easy light table.
I had a few rules: No paint, no saw, and no nails. It also had to be simple to assemble and economical. So when I spotted a large, gently used acrylic box frame — like this — at SCRAP (San Francisco’s reuse center for artists and teachers), I knew I had my answer. If you don’t have any acrylic box frames lying around (who does?!), I’ve found that this can easily be replaced with a basic plastic storage container like this.
Supplies
- Acrylic box frame or storage container— Try looking in a thrift store, or maybe you already have one at home
- Large Plastic Storage Container like this one. This Rubbermaid Storage Box is fantastic and this one with a snap top lid also looks great. I’ve also spotted really nice boxes at IKEA, which may be worth hunting down.
- String of Lights — Make sure that they’re bright enough yet not too hot to be placed in the container. Christmas lights do a great job!
- Clear Packing Tape
- Wax paper
- Two 26 oz. containers of salt
- Toys and gadgets to create textures

How to build your DIY light table
1. Run your string of lights into the bottom container
My husband has a thing for lights so I raided his stash and we came up with these interesting bookcase light strips from IKEA that worked really well. Granted, these lights aren’t cheap, but we already had them so it didn’t really cost me anything. If these didn’t work I would have used Christmas lights. Just be sure that you use something bright enough for light to pass through the salt, but not too hot for the box. Fluorescent lights are perfect for this.
Option #2: You could try setting this up with the bottom container’s lid on and off. We’ve set this up both ways with different containers. See what works best with your container.
Option #3: You might also try flipping your bottom container upside down, and then placing the second container on top of it, right side up. Does that make sense?
2. Place the box fame on top of a large under-the-bed plastic container
When not in use as a light table, we use our containers all the time for messy sensory projects like the Dry Ice Experiment and Vinegar and Baking Soda.

2. To diffuse the light, cover the bottom of the box frame or top container with wax paper.
3. Then, to keep the frame from wiggling, tape the wax paper in place with clear packing tape.
4. Pour salt into the top container.
Make it as shallow or as deep as you like. I found that 1/4″ is a good place to start.
My friend Aude gave me about five pounds of salt that I’ve been saving for the perfect project, so I pulled it out and poured a healthy amount into the frame. (In case you were wondering, don’t waste your time with flour — I did, and it doesn’t work.) And that’s it.
If you only have one container, if it has a deep groove on the bottom, you could try using JUST the storage container flipped upside down on top of the lights. Then pour sand into the groove of the box bottom. It’s not as deep as our example, but it might work in a pinch.

Play with your DIY Light Table!
We built this while the kids were asleep, so I got to play with it first. Yipee. Initially there was too much salt in the frame, making it difficult for the light pass through, and I tinkered with the salt until I liked the results.
 Pressing different materials into the salt was oddly cathartic, like raking in a zen garden or working with clay, and I couldn’t wait to see how my daughter would investigate the materials the next day.

Kid-tested DIY Light Table
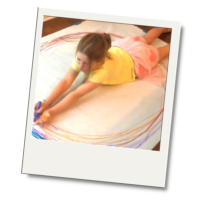
As an invitation to play, I initially made some loopy marks in the salt with my finger and then turned the glowing salt table on. No tools. She was curious, but not intrigued enough to play.
So I placed a few clay tools with various textures next to the table for her to experiment with, but that didn’t come on like gangbusters either. I hoped that N would get into this cool, open-ended textural play, but her lack of interest made me all the happier that I only spent about $2 on the project. I must have known.
And maybe the light table is most successful in the dark of night, which is long after bed time in the middle of summer? So I poured the salt back into the bag, disassembled the whole thing in about five minutes, and we’ll try again one day soon.
Light Table Success
Sometimes projects with kids take a bit of patience. A child’s mood, interests, or developmental readiness can affect how he or she interacts with an invitation to play. I have since brought this back with variations and it’s been more successful! Here are a couple things that we’ve tried:
- We made a similar DIY LIght Table for transparent materials such as magna tiles and acrylic shapes.
- We filled our top container with water and water beads for this cool water bead sensory experience.
One more DIY Light Table

For a flat-top light table, see this tutorial: Homemade Easy Low-cost Light Table


this is so cool, rachelle! the photos of it are intriguing and artistic in themselves!
funny you should say that, jen — i was totally digging the photos, too!
I want to make one! And if the 2 girls don’t play with it, I will! I don’t think they would miss an opportunity like this though. Hmmm, now to find the perfect container, lights and raid my cupboards (and the bf’s) for some salt.
🙂 I hope your little ones have fun with this, and do let me know if/how you make one, Steph.
Yes, I am. I’m tired of tracing embroidery patterns up against the slider–it makes my arms tired and I can only do it during the daytime. But if I made one I’d share it with the kids too, of course.
Ohhh, I hadn’t really thought of recommending this for moms and dads, but YES! I’d love to know if this works for you.
This is so cool! I’ve been wanting to make something like this and this is a great tutorial!
Awesome, Leslie. I’m glad to help.
This is so Fabulous! I’ve wanted to create one too, but wonder if C would even enjoy it?
The pictures are so intriguing and I know I would love to play with it! I guess if C saw me playing with it she might get intrigued. Thanks so much for the inspiration. SO glad you are here in the blogging world!
Thanks Melissa. I bet C would have fun with this. Do let me know if you try it out.
Yes! Awesome! i wonder if it would work with sand? I’ll be on the hunt for the frame (have everything else) today.
Wow! I’m totally making one of those! Thanks. I’ve seen others that just looked too hard or expensive to make. But yours is definitely doable.
Yay! It’s pretty painless — both to make and to pay for. I can’t wait to see your take on it.
AHHHH-SOME!!! My hat off to you … this is beautiful Rachel! Wondering, (since I have a ton of play sand), if it works with white sand. Wow! Sensory to a new level! I love it!
Thanks so much, Linda! I didn’t test this with sand since it was late at night and I wasn’t up for a trip out to the sandbox, but I bet it would work if the sand is fine. It’s worth trying, at least!
oh how fun! at least you and your hubby had fun with it! very creative – I know 3 little boys who would go to town with this project!
We did have fun with it, and it’ll come back out again one day, I’m sure 🙂
seriously, how fun!!!!! those pictures are making me itch to run out and buy stuff to make my own Rachelle!!! you must post pics of your daughter having fun with it!!!
would love for you to share on this week’s sunday showcase – http://momto2poshlildivas.blogspot.com/2011/08/sunday-showcase-81411-link-up-share.html
I am highlighting this on my FB page and twitter – so creative & fun!!!
I felt the same way about it when I saw photos of other light tables around the web. They’re stunning to look at. I’m a little late getting back to you and I’ll see if I can still link up. Thanks for the FB and twitter love — I’m grateful!
I love the addition of the salt!!! It really added a different dimension to the light table.
The salt is awesome (and I’ve been dying to find a good use for all that salt!).
Hi Rachelle! Just posted a about this on Craft Gossip! I can’t wait to make one of these….love the photos 🙂
Here is the link:
http://lessonplans.craftgossip.com/?p=4515
LOVED this so much it’s been featured on the sunday showcase this week! 🙂
Beautiful photographs and a great inexpensive way to make a light table – love it. Thanks for sharing 🙂
P.S. – Where’d you get those great textured rolling pins?!
What a great project, I’ve never seen one like this! You say your daughter wasn’t intrigued, what if you added colored Christmas lights, or used them instead of the white ones? Some color might spark some interest – just a thought!
What a very cool idea. Thanks!
Light tables are sooo cool. I use mine all the time – it makes embroidery, fabric painting and tracing possible so that I can actually get good results. I love the salt idea for little ones – but my table (also homemade) is a wood, nails and glass affair not really suitable for toddlers. I’ll have to do some thinking….
You might try cloud dough – it is just 8 cups of flour and one cup of baby oil, mix well, still feels like flour but oddly mold-able… I found the idea here http://www.jugglingwithkids.com/2011/11/cloud-dough.html
Another cool idea was the whole water bead thing (close supervision required)
I found that here – http://themommiesmademedoit.blogspot.com/search/label/sensory (scroll down a bit)
I can not find the right sized container to put the picture frame on. Could you tell me what size/brand your container is and where you got it pretty please?
Hi Megan,
I’m not sure what size your box frame is, but ours fit on top of a box made by Sterilite, and it’s 22″ x 16″ x 6″. I think I got them at Target. Mine has a blue lid, but this looks similar: http://goo.gl/emGsj Let me know if this helps!
Rachelle
I have a 16 by 20 inch box frame. That helps a lot! thank you! I looked at Walmart, they didn’t have much at all. I will definitely check out Target.
If you can get to Sproutonline.com, watch a few of the Sandy Stories with your little! They will get the curiosity and creativity going. My little doesnt have a light table but loves to make her own stories in foam soap or bathtub paint. I am going to try to make her a light table very soon!
amazing. And, I have to say, the salt textures are a little creepy. Would be fun to Halloween it up when that rolls around. Thanks! x a
For newest information you have to go to see internet and on internet I found this web page
as a finest web page for latest updates.
I see you don’t monetize tinkerlab.com, don’t waste your traffic, you can earn additional bucks every month with new monetization method.
This is the best adsense alternative for any type of website (they approve all sites), for more details simply search in gooogle:
murgrabia’s tools
[…] Build an easy light table […]