 Today I’m excited to introduce you to Jody Alexander. Jody is a librarian and bookmaker who teaches bookmaking from Wishi Washi Studio in Santa Cruz, CA, and also teaches classes through the newly-launched Creative Bug. Tinkerlab special: Jody is sharing a code for a Creative Bug discount at the end of this post.
Once you make one of these Bamboo Rubber Band Books, you’ll find tons of creative ways to fill them with your own ideas, use them as sketchbooks, fill them with writing practice, or turn them into gifts.
Welcome, Jody!
Kids love to make books. They really do! I have been making books with kids for about 15 years now. First going into my son’s classrooms and teaching him and his classmates various book structures and then teaching at different art camps.
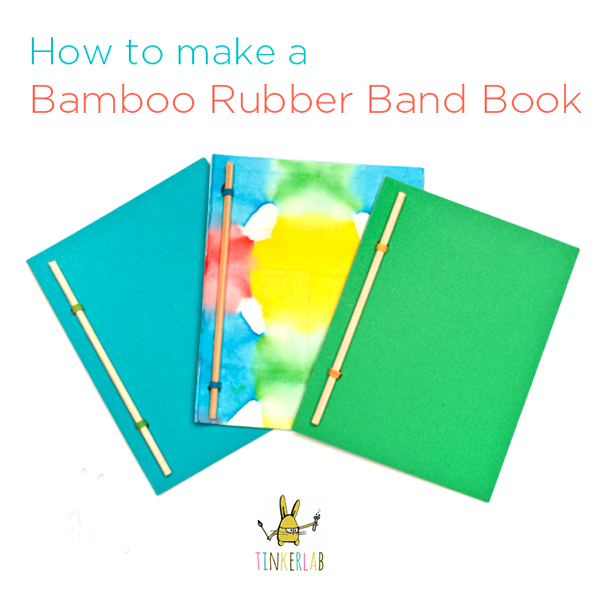
The Bamboo Rubber Band Book is a simple and easy book structure to make with kids. I have taught this structure to ages 5 years old and up and I can’t tell you how proud they all have been after making a book. This book can be made with pages and covers that have already been pre-printed or decorated, or with blank pages to draw or write on later. It is a great little book for drawings and a little story.
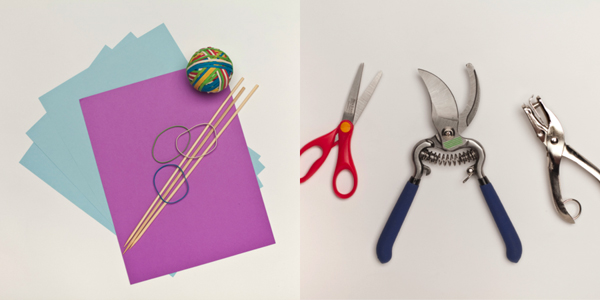
Materials
- 8 ½ x 11 text weight paper (2-4 pieces – can vary)
- 8 ½ x 11 cover weight paper (1 piece)
- rubber band
- bamboo skewer
Tools
- scissors
- hole punch
- garden hand shears
Step one
Cut text weight paper into quarters – here is how do this without measuring:
- Fold paper in half the long way
- Open up
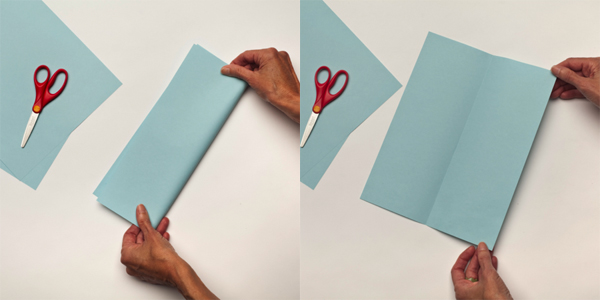
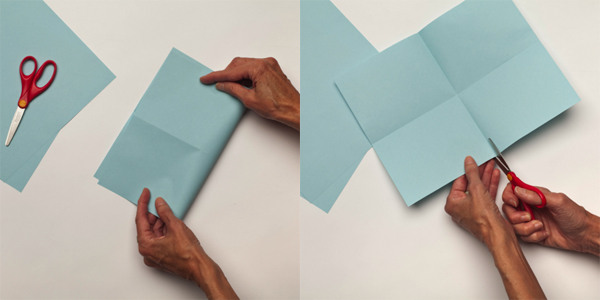
- Fold paper in half the short way
- Open up
- Cut along fold lines
Step two
Cut the cover weight paper in the same way – you will end up with enough cover paper for two books
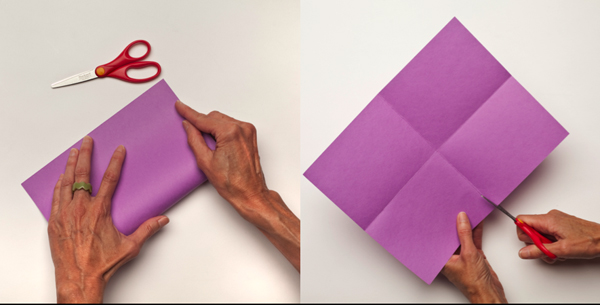
Step three
Stack your cut paper sandwiching the text paper in between the two cover pieces
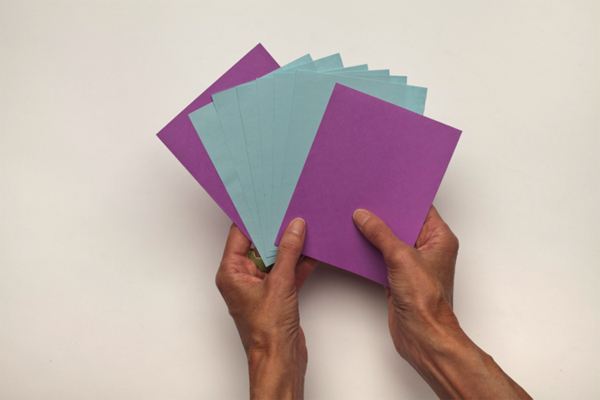
Steps four & five
Punch two holes along the spine of the book – approximately 1/2 inch from the spine edge and 1 inch from the top and bottom (this can vary but making the holes too close to the edges puts them at risk to rip out)
Cut the bamboo skewer to 5 inches in length with garden hand shears.
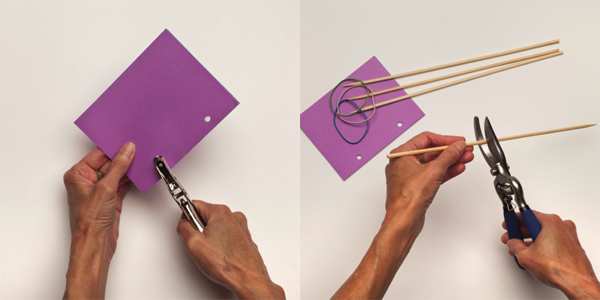
Step six
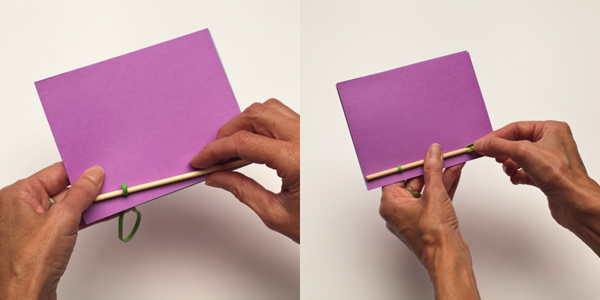
Thread the rubber band through the holes and capture the bamboo skewer – this will hold the cover and pages together.
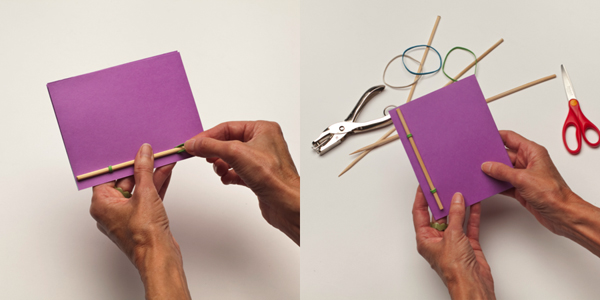
You made a book!
- Put as many or as few pages in the book that fits your project.
- Make a book out of pre-printed pages
- Make a book out of blank pages and write or draw in it.
- Enjoy your book!
Want to make more books? Or make this one fancier?
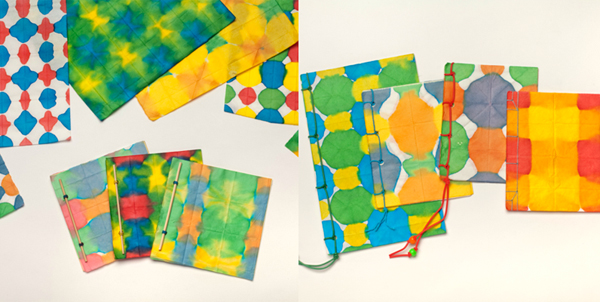
Learn how to make Orizomegami with me on Creativebug. Orizomegami is a traditional Japanese paper dying technique that is a fun and easy kid-friendly project that is perfect for book covers.
 And, if you are ready for a slightly more challenging binding – but still quite accessible to children – try my Japanese Side Sewn Binding for Kids class on Creativebug.
Thanks for introducing us to this book-making technique today, Jody! I’m so glad that we met and look forward to learning more from you through Creative Bug.


WOW…this is my version =)
http://marypoppins-giocale.blogspot.it/2013/09/rilegatura.html
Ooh my kids are going to love this!
Awesome, Kate! This makes me happy 🙂
I don’t understand what to do with the leftover rubberband at the end. Thanks!
Hi Carrie,
The rubber band goes through one hole and catches the bamboo stick. Then you pull it up through the other hole and catch the other end of the bamboo stick. Does that help?
Rachelle
Its to make the second book. In the beginning she said there were enough materials to make two. 🙂
[…] Bind your homemade art book together with rubber bands. The inside can hold your favorite paintings or drawings. via Tinker Lab […]
[…] Bind your homemade art book together with rubber bands. The inside can hold your favorite paintings or drawings. via Tinker Lab […]