How to Make Paper with Kids: A step-by-step tutorial
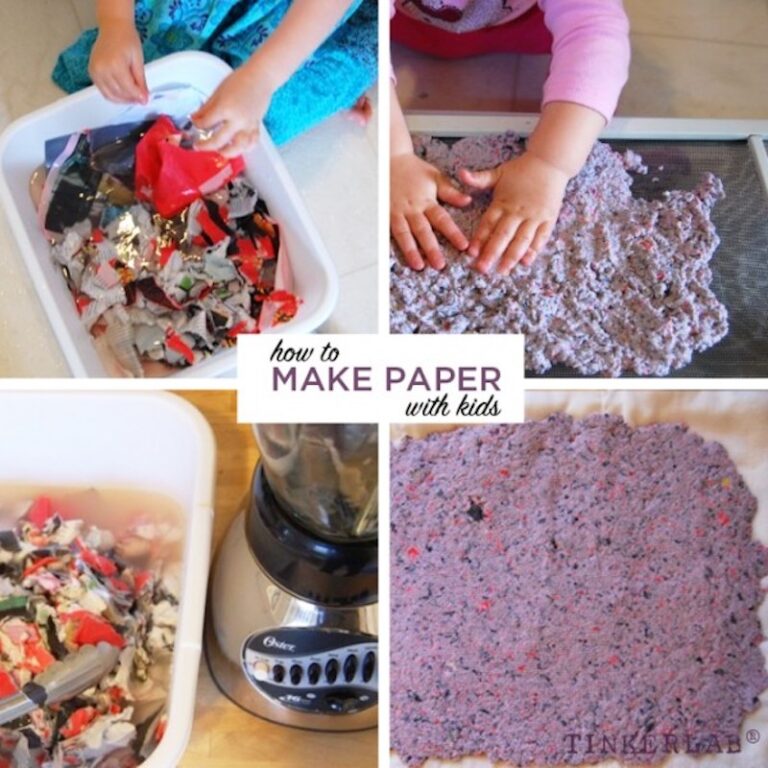
Making paper with kids is a rewarding experience, and today I’m going to share how to make paper with kids. These steps work for anyone interested in learning how to make paper, and I give specific tips and advice on…