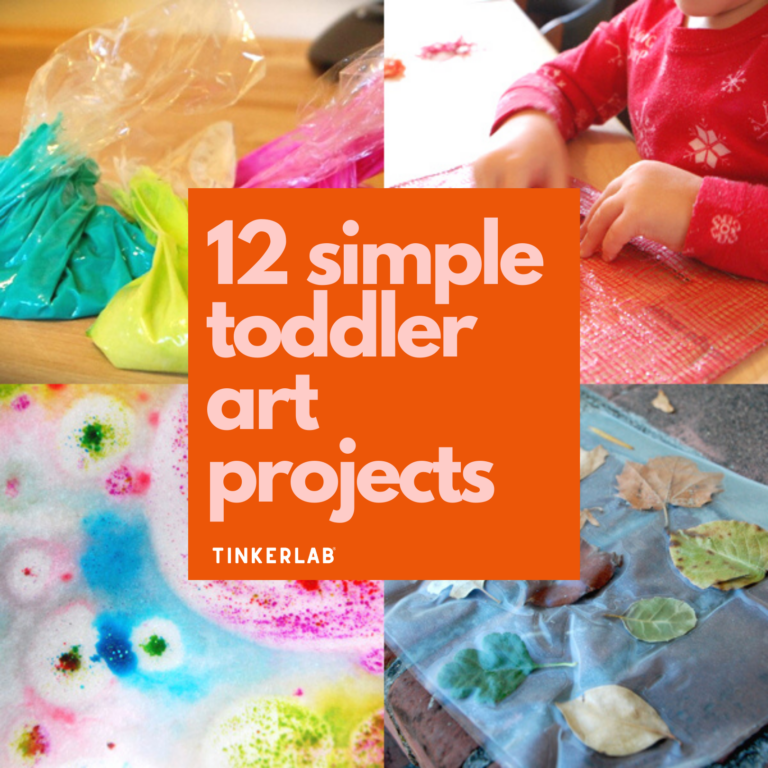
TinkerLab

  • HOME
  • ACTIVITIES
    • ART
    • SCIENCE
    • SENSORY
    • BABIES
    • TODDLERS
    • PRESCHOOL
    • ELEMENTARY
    • MONTHLY ART CHALLENGE
  • ABOUT
    • START HERE
    • ABOUT RACHELLE
    • FAQ
    • PRIVACY POLICY
    • LOCAL NEWSLETTER
    • SHOP
    • CONTACT
  • BOOKS
  • BLOG
  • SUBSCRIBE
You are here: Home / Archives for Activities

Easy Drawing Ideas | Kawaii Cute Penguin Drawing

By Rachelle 5 Comments

Over the years I’ve heard from so many parents and teachers who want to support drawing skills for young children with easy drawing ideas. Along with that, I’m also asked about how to support drawing skills.

Here are a few of my favorite drawing tips that have worked for our family and countless others:

  • Follow the child’s interests. If the topic peeks their curiosity, there’s a better chance they’ll look forward to the drawing challenge.
  • Make it fun and light and keep the pressure low.
  • Make it playful. Play drawing games like playing with Art Dice or One-minute drawings.
  • Use interesting drawing materials such as feather quills or clay.
  • Model a drawing mindset. Show your own interest in drawing, and willingness to experiment and make mistakes.
  • Share easy steps that break down the drawing process, yet keep the end result open-ended (like those in this printable)


How to draw a cute Kawaii Penguin.I will be the first to admit that I love cute things, and that passion has been passed down to my children who are obsessed with Japanese cartoons, Kawaii characters, Shopkins, and manga. Rather than run from this passion I decided to embrace it.

Scroll to the end of this post for a link to the free printable that you can download today.

How to Draw a Kawaii Cute Penguin

How to draw a cute penguin with kids

Kawaii (pronounced Hawaii) is the Japanese word for cute, lovable, and adorable. Interestingly, the word’s original meaning described someone who was blushing from embarrassment.

But for today’s purpose, we’ll go with cute and lovable. Well, that penguin below may  be blushing…

One of the things I care most about as an arts educator is encouraging and supporting individual expression and ideas in art making. Prescriptive, how-to tutorials concern me as I worry about children taking them too literally.

This process, however, should be seen as an inspirational foundation or starting point from which to build personal and unique ideas. I gave the sheet to my five-year old tester, and you can see that she took it into completely original territory.

How to draw a cute penguin with kids

How to draw a cute penguin with kids

Printable for the Kawaii Cute Penguin

How to draw a cute penguin with kids

The penguin is drawn in six easy steps.

Download the printable here.

Once you’re done, feel free to add your own ideas, backgrounds, textures, and props.

Filed Under: Activities, Drawing Tagged With: animals, drawing, kawaii, kids, preschool

Easy Contact Solution Glitter Slime

By Rachelle 12 Comments

Glitter Slime from the TinkerLab Slime Lab

I have yet to meet a kid who isn’t crazy for slime. We first made slime when my daughter was two. It was such a hit that we printed up the recipe (download it here) and I published it in my book, TinkerLab: A Hands-on Guide for Little Inventors.

TinkerLab has readers from all over the world, and I learned that not all of the ingredients in our original slime recipe can be found outside of the United States. So, I did some digging to find an incredible slime recipe that can be made with ingredients – worldwide.

Note: This post contains affiliate links.

Low and behold, I found a simple over-the-counter slime recipe, and it’s amazing! My kids tested it, loved it, stretched it, played with it endlessly, packed it away in plastic baggies, and have continued to use it for over the past few weeks. Plus, glitter!

We’ve always used Elmer’s school glue  for our slime (I stock gallons of it – no joke!), and it’s no surprise that Elmer’s is also behind the Glitter Glue in this Glitter Slime recipe. Not only is Elmer’s a solid product that I trust for our crafting needs, but it’s also affordable, making slime an economical activity that keeps on giving.

Here’s how to make an easy GLITTER slime with just three ingredients…

Supplies for Glitter Slime

  • Bottle of Elmer’s Glitter Glue (6 oz.)
  • 1.5 teaspoons (7.5 ml) baking soda – We are die-hard fans of Arm and Hammer Brand
  • 1.5 teaspoons (7.5 ml) eye drops or saline solution (contact solution) with Boric Acid or Sodium Borate in the ingredients – We used Bausch and Lomb ReNu Contact Solution
  • Spoon or spatula
  • Mixing bowl

Steps for Glitter Slime

  1. Empty the bottle of glitter glue into a mixing bowl
  2. Stir in the baking soda. Mix well.
  3. Add contact solution and mix until slime forms. You’ll notice it comes together immediately, and takes a few minutes to fully form.
  4. Knead the slime with your hands to get it to a consistency you’re happy with.

slime recipe cards tinkerlab


Would you like our free recipe card for two kinds of slime? Go ahead and download it here >>> Click here to download the free Slime Recipe Cards


How to Make Saline Solution Glitter Slime

glitter glue slime

Empty the bottle of glitter glue into a mixing bowl

saline solution slime recipe

Stir in the baking soda. Mix well.

Add contact solution and mix until slime forms.

glitter slime borax free

You’ll notice it comes together immediately, and takes a few minutes to fully form.

easy contact solution slime

Knead the slime with your hands to get it to a consistency you’re happy with.


Note: Be sure to wash your hands after playing with slime, and always use your best judgement when using sensory and art supplies with children.


The Science Behind the Slime

Contact solution contains boric acid which is a disinfectant that keeps the eyes fungus-free. This makes contact lens wearer’s eyes super happy. School glue contains polyvinyl alcohol (also known as PVA) which is made up of ethylene, oxygen, and acetic acid (from vinegar).

Here’s how it the slime comes together: The polyvinyl alcohol molecules (found in the glue) and boric acid (found in the contact solution) combine and stick together. As they combine they make a polymer chain, which is the slime!

fluffy snow slime

More Slime Recipes from our Slime Lab

Fluffy Snow Slime (it sparkles!)

4-Ingredient Fluffy Slime

3-Ingredient Slime

Cozy Christmas Slime for the Holidays

Sparkly Glitter New Years Slime Recipe

Slime Recipe Cards (Glitter and Easy Slime with Borax) – PDF

Borax vs. Boric Acid

Are you interested in the difference between Borax and Boric Acid? Click over to this slime recipe for the full scoop.

Thank you Elmer’s for sponsoring this post. All opinions are my own.

Filed Under: Activities, Art Activities, Science Experiments, Slime, STEAM Tagged With: art, science

Scrap Wood Sculpture for Kids

By Rachelle 4 Comments

Scrap wood sculpture lesson for preschool

scrap wood sculpture tinkerlab

If you happen to have a big bag of dowel pins sitting around like we did (thank you, IKEA, for making that necessary), Scrap Wood Sculpture is a fun way to put them to good, creative use. No dowel pins? You can have fun building glue-gun skills with kids with just about any collection of small pieces of scrap wood.

This post contains affiliate links.

dowel pin sculpture

Supplies

  1. Dowel Pins. Another option are these wooden spools or even corks!
  2. Colored glue gun sticks. Clear glue is a-okay. We like to mix it up with color for extra fun.
  3. Low-heat glue gun (ignore the mediocre reviews — this is a great tool for kids — see photo below)
  4. Scrap wood for base

low heat glue gun tinkerlab

Directions

  1. Place the dowel pins or wood scraps in a bowl.
  2. Set up a base.
  3. Add colored glue sticks to your glue gun for a fun variation on the usual — clear glue is also just fine!
  4. Introduce your child to the glue gun: While the low-heat gun should not cause any burns, it’s still smart to exercise caution when using it. Explain that you shouldn’t touch the metal tip nor the warm glue as it comes out. Young preschoolers may need extra help squeezing the glue gun. This is an excellent way to build fine motor development and work on hand strengthening.
  5. Invite your child to connect and build a sculpture using her imagination.

wood sculpture tinkerlab

Extend this!

When you’re all done:

  1. Give your sculpture a title.
  2. Make a few pieces and create museum-style labels for them.
  3. Set up a sculpture gallery and invite family members to view the art. Ask you artist to explain her work.

More glue gun ideas

Make an invention kit for open-ended discovery and creativity!

Build found object art — these junk critters are adorable!

Try your hand at recycled sculpture — this is a good one for young preschoolers!

Teacher Tom has a lovely post on the use of white glue vs. glue gun (and maybe it’s okay to use both!)

Scrap wood sculpture lesson for preschool

Filed Under: Activities Tagged With: art, glue gun, kids, preschool, sculpture, wood

How to Make Melted Crayon Art

By Rachelle 1 Comment

Today I’m sharing how to make melted crayon art. This fun STEAM project combines the art of drawing with the reaction of crayons melting on a warm griddle.

Scroll down to watch a video of the process in action.

How to make melted crayon art

Supplies

This list contains affiliate links

Hot Plate: We use Cool Touch Electric Griddle
Crayons: We like Crayola, especially when they’re free from a restaurant, but you could try any crayon.
Aluminum Foil: Use 2 layers of regular foil (in case it rips) or one layer of heavy duty foil.
Paper Towels: To clean the surface between layers

How to make melted crayon art with a griddle

Steps

  1. Before you turn the griddle on, cover it with aluminum foil.
  2. Tape the foil to areas of the plate that do not heat up. This will keep the foil from sliding.
  3. Turn the burner on to about 200 degrees, or just warm enough to melt the crayons (but not so hot that you scorch yourself!).
  4. Draw on the foil with crayons. They will melt!
  5. Peel the crayon paper back as needed.
  6. Make a print by placing a sheet of card stock or other heavy paper on the melted crayon.
  7. Wipe the foil clean and start all over again.
  8. Be safe! Use caution with hot burners.

How to make melted crayon art with a hot plate

Watch the Video

How to make melted crayon art

STEAM art project: Create melted crayon drawings on a warming tray

https://tinkerlab.com/wp-content/uploads/2016/04/melted-crayon-drawing-warming-tray.jpg

Filed Under: Activities Tagged With: art, crayon, kids, preschool, process art

12 Art Projects for Toddlers

By Rachelle 7 Comments

12 Simple Toddler Art Projects

12 Simple Toddler Art ProjectsI’m often asked for activity ideas for arts and crafts for toddlers, so I collected a few of my favorite toddler art projects. Because I’m all about keeping things simple and child-centered, these art activities are (for the most part) easy to execute, don’t call for a lot of fancy supplies, and are 100% age-appropriate for little hands. In most cases, you’ll already have these supplies at home.

Toddlers are experiential and enjoy expressing themselves through creative play. You will find them working on fine motor skills, painting technique, exploring textures such as the feeling of finger paint or a bowl of dry beans. They also learn through movement, and I always encourage parents and teachers to find ways to get up and wiggle or try these projects standing or sitting on the floor if sitting at a table is too difficult.

12 Toddler Art Projects

12 Simple and Fun Art Projects for Toddlers | TinkerLab.com
Make your own simple paint recipe. Making your own paint can be easy! This paint isn’t super archival and it won’t look like store-bought paint, but it’s especially useful if you have a child who likes to use a lot of paint, and you’re less concerned with a final product

Sewing with Toddlers. Use the mess from a bag of fruit or vegetables and cardboard, and you have a toddler-friendly loom that’s ready to go.

Marbleized Paper. Marbleize your own gorgeous designs with this simple recipe that calls for liquid watercolors and oil as the base.

Contact Paper Leaf Collage. This is one of my very favorite toddler art projects for parents who are mess-averse. Experience the tackiness of contact paper in this non-messy leaf-collecting + composition-building activity, and stay clean along the way.

12 Simple and Fun Art Projects for Toddlers | TinkerLab.com

Squeezing Paint. For the child who likes to squeeze a lot of paint, this is for you. You might like to couple this with the “Make your own Paint” recipe (above)

Winter Collage with paper and stickers. Offer your child a selection of pre-cut paper and stickers for this age-appropriate collage activity.

Glueing Dots and Buttons. Squeeze a few dots of glue on paper and invite your child to add buttons. A great activity for hand-eye coordination and fine motor skill development.

Stringing Beads. Plastic string plus beads with big holes make this a rewarding activity for toddlers who are flexing their hand-eye coordination.

12 Simple and Fun Art Projects for Toddlers | TinkerLab.com

Tracing Circles. Grab a cup, paper, and a marker, and invite your child to trace circles. It seems easy, but it can be challenging!

Butterfly Prints with paper and paint. Fold a piece of paper in half, add dollops of paint to one half, and fold. The results bring out big ooohs, and ahhhs.

Body Tracing. Invite your child to lie down on a big sheet of paper. Trace their body and then offer them pens or crayons to decorate.

{Tidy} Watercolor Painting. This is one of my favorite set-ups for watercolor painting. The whole thing happens within the confines of a tray, keeping the painting in one area.

12 Simple and Fun Toddler Art Projects | TinkerLab.com

Bonus: 50 Art Materials for Toddlers

50 Art Materials for Toddlers is a fun post that rounds up our favorite supplies for little hands. We asked our readers to share some of their favorites, which are added in the comments. See what you think!

Join the TinkerLab Community

If you enjoyed this post, you might like to sign up for the weekly TinkerLab newsletter. It’s free and we often send exclusive content and opportunities that are only available to our subscribers.

In case you blinked and missed it, TinkerLab rounds up all the great stuff on the internets on keeping you and your critters creative and wraps it up for you in a tidy newsletter! (And throws in some secret giveaways for good measure!)  – Yuliya P., San Francisco, CA

Join our community and you’ll learn:

  • How to simplify your life and make more room for creativity
  • How to make hands-on making a part of your everyday life
  • Easy, actionable ways to raise creative kids

TinkerLab Newsletter


Filed Under: Activities Tagged With: toddlers

Fun Science Experiments: Vinegar and Baking Soda

By Rachelle 2 Comments

baking soda vinegar experiment

Baking Soda and Science Exploration | Fun Science Experiments | TinkerLab.com

My kids love fun science experiments. While cooking breakfast the other day, my three-year old asked about making concoctions with the breakfast supplies. While I’m all for mixing up ingredients with kids, I wasn’t prepared to have a lot of good food go to waste.

So we set up a classic concoction center with some baking soda and vinegar. So much fun!

Supplies: Fun Kitchen Science Experiment

I’ve included some Amazon affiliate links for your convenience

  • Vinegar – I like this big jug for the convenience of having lots of vinegar on hand for more experiments
  • Baking Soda
  • Tray
  • Small pitcher
  • Spoon/s
  • Bowl/s
  • Food coloring (optional)

Baking Soda and Science Exploration | Fun Science Experiments | TinkerLab.com

Steps: Set up a Concoction Experiment

  1. Set up a tray or deep tub and fill it with a handful of small bowls.
  2. Fill a bowl with baking soda and a small spoon
  3. Fill a small pitcher with vinegar
  4. Offer this invitation to your little scientist

Baking Soda and Science Exploration | Fun Science Experiments | TinkerLab.com

After some fizzy exploration, my daughter wanted to see what would happen if we added some salt, so we brought salt over.  In the past we’ve also added flour, baking powder, and a variety of vinegars. At this point, you could also introduce some food coloring for extra-colorful fun.

More Fun Vinegar and Baking Soda Experiments

When my older daughter was three years old, we did this same science experiment with a slightly different set-up. Hop over here to the fun Baking Soda and Vinegar Science Experiment.

Baking Soda and Science Exploration | Fun Science Experiments | TinkerLab.com

This project, like so many others that you’ll find on TinkerLab, is process-based and it’s part of the CREATIVE TABLE PROJECT. 

These projects are set up as Creative Invitations, meaning that the materials are laid out in an inviting way where the child is invited to interpret and use them however he or she likes. With creative invitations like this, I’ll sometimes give my kids a little prompt, but usually I sit back and see what they come up with…and I’m often surprised by their ingenuity.

One of my favorite things about Creative Table projects is that they’re simple. Set up takes minutes and the child determines the outcome through a process of discovery and exploration. There’s no expected outcome, which frees the parent or teacher up to relax and enjoy the process.

Around here, these creative set-ups are part of the Creative Table series, and you can find more of these ideas here.

Creative Table Project | Baking Soda and Vinegar

If you enjoyed this activity, be sure to check out our new book, TinkerLab: A Handbook for Little Inventors (affiliate link). You might also enjoy these creative invitations:

Creative Table Highlights via Instagram

Creative Table: Tape and Paper Bags

Creative Table: Paint and Looping Lines

Creative Table: Doilies and Scissors

Creative Table: Leaves and Glue

Creative Table: Stickers and Frames


Filed Under: Activities Tagged With: baking soda, science, vinegar

Next Page »

Copyright © 2019 - TinkerLab ® - All Rights Reserved