Have you ever wondered how to felt a wool sweater?
Today we’ll show you how how to felt a wool sweater and how to make felted wool flowers to use as pins or barrettes.
The inspiration for these instructions and post came from one of our favorite new books, This Book was a Tree by Marcie Cuff (Perigree, 2014). We reviewed the book here (and there are links to other reviews) in case you’d like to check it out!
How to Felt a Wool Sweater – Step 1
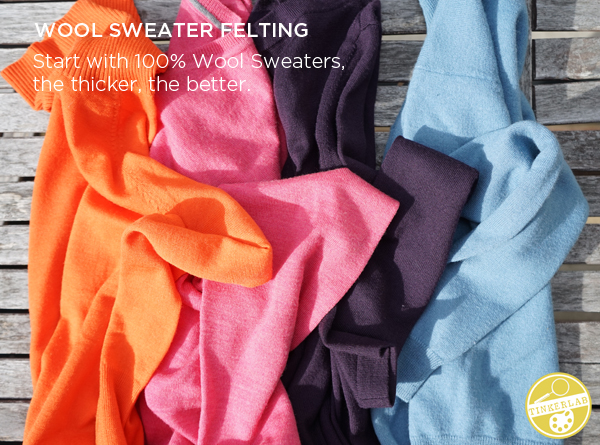
Collect your 100% wool sweaters. They should be 100% wool, and the thicker they are, the better. Alpaca is wool, and felts beautifully! I’m not sure if you can tell much about the weight of the sweaters from the image below, but the one on the right felted MUCH better than the other three, which were on the thinner side.
How to Felt a Wool Sweater – Step 2
This step may be a little painful at first if you’re using a sweater that you kind of love.
Cut the Sweater at the seams. Cut off the necks, arms, and slice right up the side seams. Cut off the edges so that the sweater has a better chance at felting. The following pictures give you an idea of what you’re after.
Use sharp scissors. I LOVE my Gingher scissors. These were recommended to every costume design student at UCLA (and I won’t even tell you how many years ago I was there!). Suffice to say that these last FOREVER. These scissors are not cheap, but if you want really great sewing scissors that will last, these are the ones.
Anything with ribbing is probably destined for the scrap bin. You’ll notice a few squares of ribbed cuffs in the bottom of the stack of the last photo (below). I was hoping that these would felt nicely, but they were a mess.
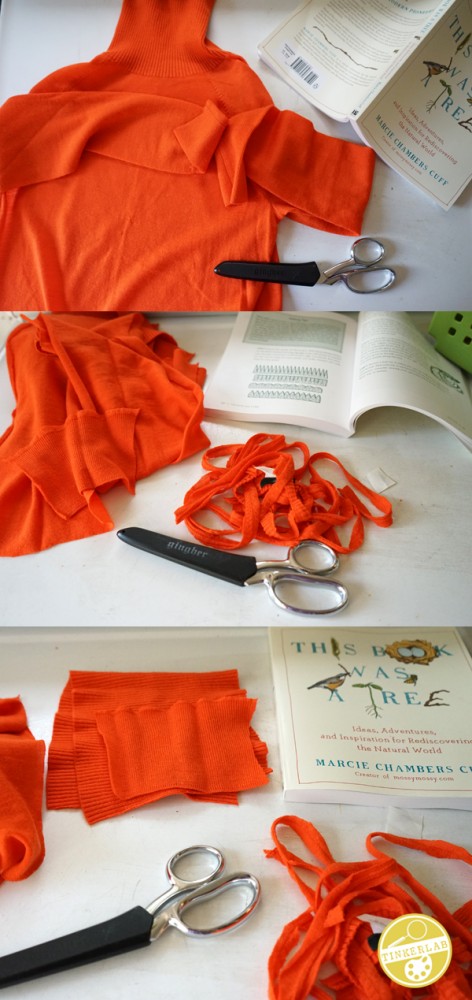
Toss your scraps. See those scraps in the bottom right hand corner (above)? Those get tossed. The ribbed cuff pieces should be tossed too.
Wash on HOT. Put all your sweater parts into a hot water wash with some detergent that will help agitate the fibers. Wash and then dry on hot. Marcie suggests doing this two times, so I washed and dried mine twice to maximize the felting.
Now you should have a mad pile of felted wool that you can turn into all sorts of wonderful things. Are you ready to make something now? Let’s get started with a felted flower!
Felt Wool Sweaters into a Felted Flower
Supplies
- Felted Wool Sweater Pieces
- Strong/thick needle
- Thread
- Ruler (optional)
- Scissors
- Hot or low-heat glue gun
- Barette clips. We used alligator clips like these, but your favorite type of clip will be great.
Steps
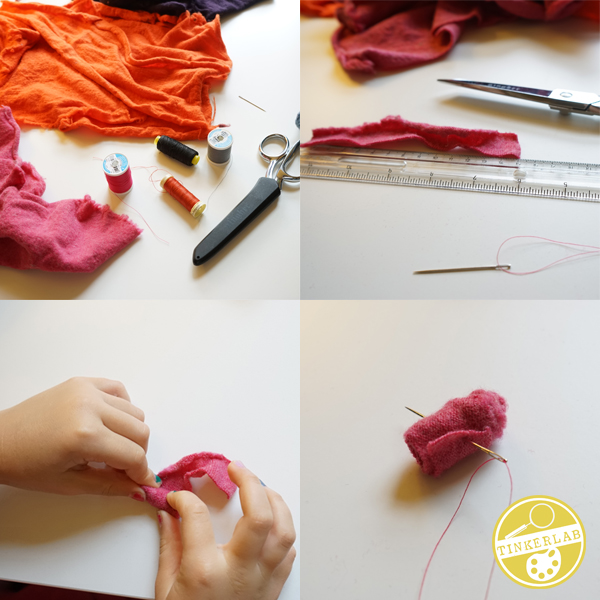
- Gather Supplies
- Measure and cut a piece of felt to be the center of the flower, about 15 cm (5″) long x 4 cm (1 1/2″) wide. Marcie’s instructions of 15 cm long x 1.5 cm will make for a flatter flower.
- Roll the piece of felt up
- Secure the felt with needle and thread
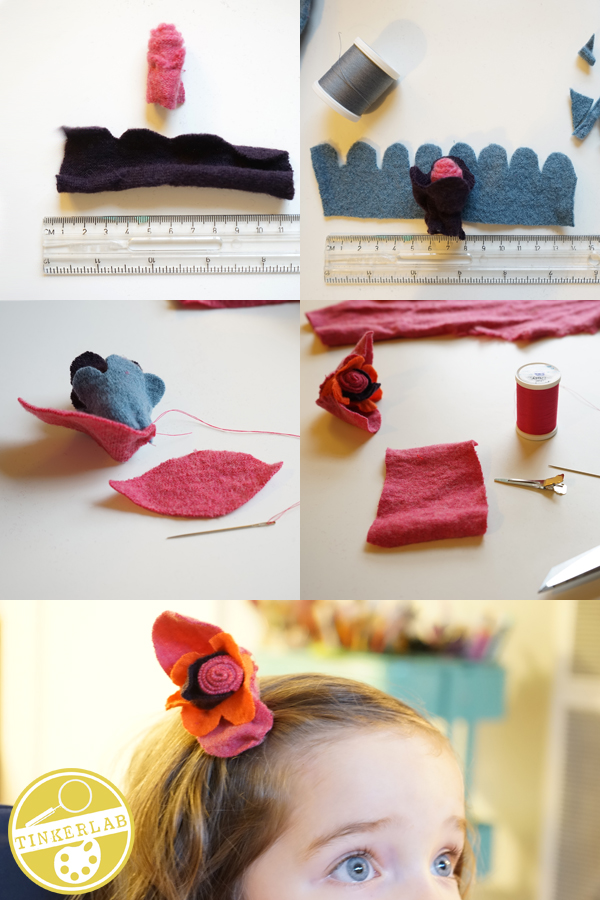
- Cut another piece of felt, about 10 cm (4″) long x 5 cm wide (2″). Cut loops or zigzags at the top of this second strop to look like petals. Wrap this second piece of felt around the center piece. Secure with needle and thread.
- Cut another piece of felt, about 10 cm (4″) long x 5 cm wide (2″) and wrap it around the flower. Secure with needle and thread.
- Cut two 6 cm x 3 cm leaf shapes and stitch them to the bottom of the flower.
- Wrap a small piece of felt around the top part of a barrette and glue it in place with a glue gun (no photo – so sorry!). The idea here is to cover the shiny silver barrette with felt. Then, glue the flower to the felt that’s attached to the barrette. Voila!
We made two felted flower barrettes, and now I have an enormous amount of felt just waiting for the next project. Any ideas for us?
More Felted Wool Sweater Projects
Recycled Wool Throw Pillows
Note: This post contains affiliate links for your convenience!


This is a great way of using old stuff you don’t need anymore! To me upcycling is actually the best and the most fascinating thing about making arts and crafts (with kids or without them)!!!