TinkerLab

  • HOME
  • ACTIVITIES
    • ART
    • SCIENCE PROJECTS
    • SENSORY
    • BABIES
    • TODDLERS
    • PRESCHOOL
    • ELEMENTARY
    • MONTHLY ART CHALLENGE
  • BOOKS
  • ABOUT
    • START HERE
    • ABOUT RACHELLE
    • FAQ
    • PRIVACY POLICY
    • IN THE MEDIA
    • SUBSCRIBE
    • LOCAL NEWSLETTER
    • CONTACT
  • CLASSES
  • SHOP
  • BLOG
You are here: Home / Archives for Crafts

How to make Tissue Paper Flowers

By Rachelle 4 Comments

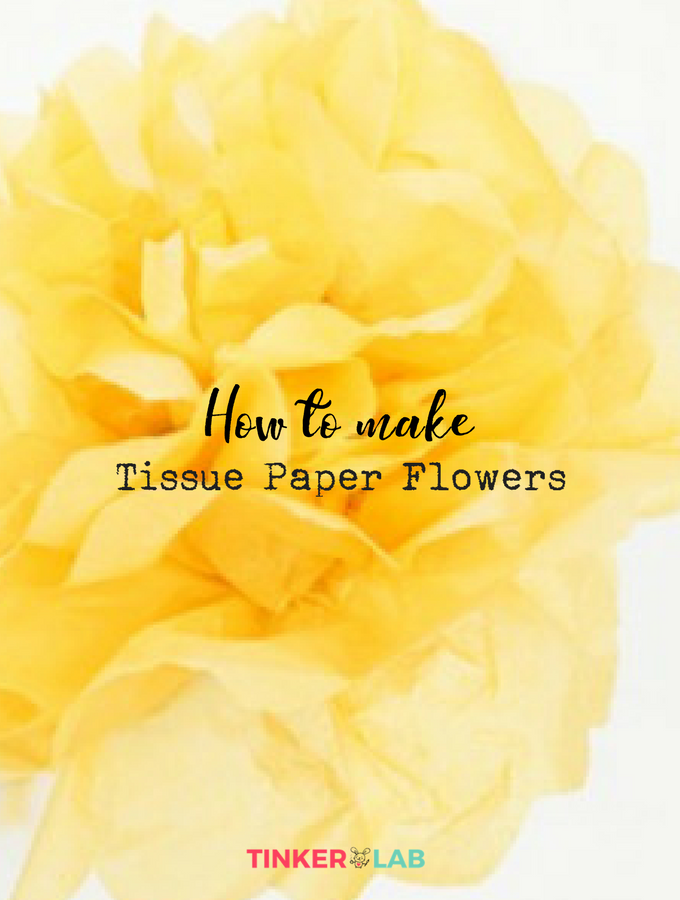
how to make tissue paper flowers

how to make tissue paper flowers

Today we’re going to make tissue paper flowers. These are so easy and economical, and they’re a wonderful spring gift for teachers or moms on Mother’s Day.

First, supplies!

how to make tissue paper flowers supplies

Tissue Paper Flower Supplies

This will make 2 tissue paper flowers.

  • 1 sheet of gift-wrapping tissue paper, approximately 20″ x 26″. If you’d like to make a bunch of flowers, this is a good deal (affiliate).
  • 2 green pipe cleaners (affiliate)
  • scissors

Step 1

  1. Cut the tissue paper in half so that you now have two sheets. You can make these any size. We started with tissue paper that was 20″ x 26″ and after we cut it, each piece was 13″ x 20″
  2. Cut each of those pieces in half. You will now have four sheets. Ours were 10 ” x 13″ each
  3. Cut each of those pieces in half. You will now have eight sheets of paper. Ours were 7.5″ x 10″

how to make tissue paper flowers step 1

 Step 2: Fold and Cut the Paper

  1. Stack four sheets of paper.
  2. Pleat the paper in an accordion fold.
  3. Cut a half-circle shape from the each end. (You could also cut a point or zig-zag)
  4. Wrap a pipe cleaner around the middle of the paper to hold it in place. This will also act as the stem.

how to make tissue paper flowers fold paper

how to make tissue paper flowers pipe cleaner

Step 3: Fan out the Flowers

  1. Fan out the paper.
  2. Gently separate the first layer of paper from the rest, and move it up to form the top layer of petals.
  3. Gently separate the rest of the paper layers.
  4. Fluff out your flower.
  5. Repeat with the other stack of four papers.

how to make tissue paper flowers cut edges

how to make tissue paper flowers fluff it

Variations

Because we’re big on experiments and self expression, use this as a starting point and see what else you can come up with. If you’re working with children, encourage their imaginations to flourish by asking them if they have more ideas.

  • Try making those with tiny sheets of paper
  • Make gigantic flowers
  • Make multi-colored flowers with different colors of tissue paper
  • Cut different shapes off the edges of your petals such as triangles or fringe
  • Make a stack of more pieces of paper for a fuller flower

What to do with tissue paper flowers

  • Give a bouquet to mom for Mother’s Day
  • Give these to a beloved teacher for Teacher Appreciation Week
  • Surprise a friend who’s home sick
  • Decorate a birthday gift with mini flowers
  • Decorate a Christmas tree with flowers


Filed Under: Art Activities, Crafts, Spring Tagged With: flowers, paper flowers

Pom Pom Christmas Bauble Ornaments

By Rachelle 3 Comments

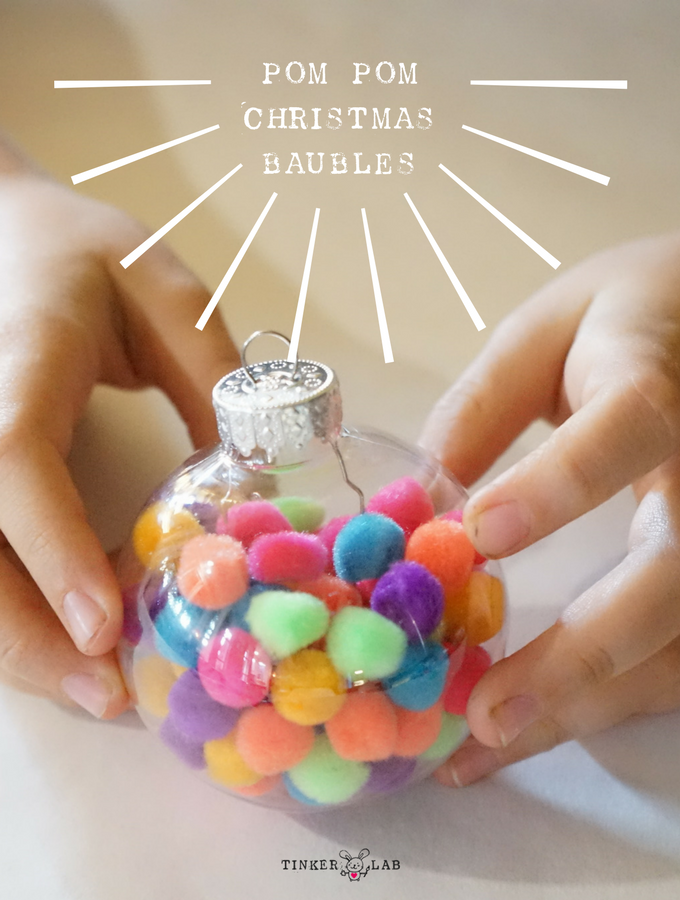
Pom pom Christmas bauble craft project for kids

Oh what fun! When the holiday season gets a little bit too busy, I like to retreat with a hot cup of tea, cozy socks, and a juicy magazine. And when it comes to crafting, I try to keep things super simple so my mind doesn’t feel that intense overwhelm that can come with doing too much. In that spirit, this Pom Pom Christmas Ornament Bauble has got to be one of the easiest ornament crafts around. To set this up requires little effort, and the result is charming.

Pom pom Christmas bauble craft project for kids

Supplies

Note: This post contains affiliate links

  • Clear plastic ornament balls like these.
  • Small pom poms like these
  • Ribbon
  • Low-heat glue gun << We used this dual temperature glue gun from Elmer’s

Set-up and Steps

  1. Clear the table and set up a bowl of pom poms, a few clear ornament balls, ribbon, and the low-heat glue gun.
  2. Invite your child to create an ornament.
  3. Fill the ornament with pom poms.
  4. Tie a ribbon around the top loop.
  5. Add pom poms to the ribbon with the glue gun.

Creativity Corner

Sometimes kids will come up with their own ideas that stretch outside the bounds of what you may have in mind. I love these moments and encourage them as they help children develop their independence and imagination. If your child wants to add sequins or buttons instead of pom poms, or wants to fill the ball with glitter, be open to the possibility that your child may come up with his or her own ideas. This is a great opportunity for playful crafting. Encourage creativity and imagination!

Easy kids Christmas ornament

Pom Pom Christmas Ornament Bauble

Glue Gun Crafts with Kids

Scrap Wood Sculptures: Glue Gun Skill Building Activity

Build Found Object Junk Critters

More Ornaments with Kids

Salt Dough Ornaments. These are gorgeous and last for multiple seasons.

Pipe Cleaner (Chenille Stem) Ornaments with beads

Stacked Felt Ornaments that teach sewing basics.

DIY Fabric Ornaments, beginning sewing project.

More Pom Pom Ornaments!

Click here to learn how to make another super easy Pom Pom Christmas Ornament with Pinecones…

pom pom Christmas ornaments

Filed Under: Art Activities, Christmas, Craft, Crafts, Elementary - 1, Pre-School, Toddler

Pom Pom Christmas Pinecone Ornament Craft

By Rachelle 6 Comments

DIY kids pinecone Christmas ornament

The holiday season is upon us and the smells of the season are filling our home with cinnamon, fir, cloves, vanilla, and pine. It’s delightful!

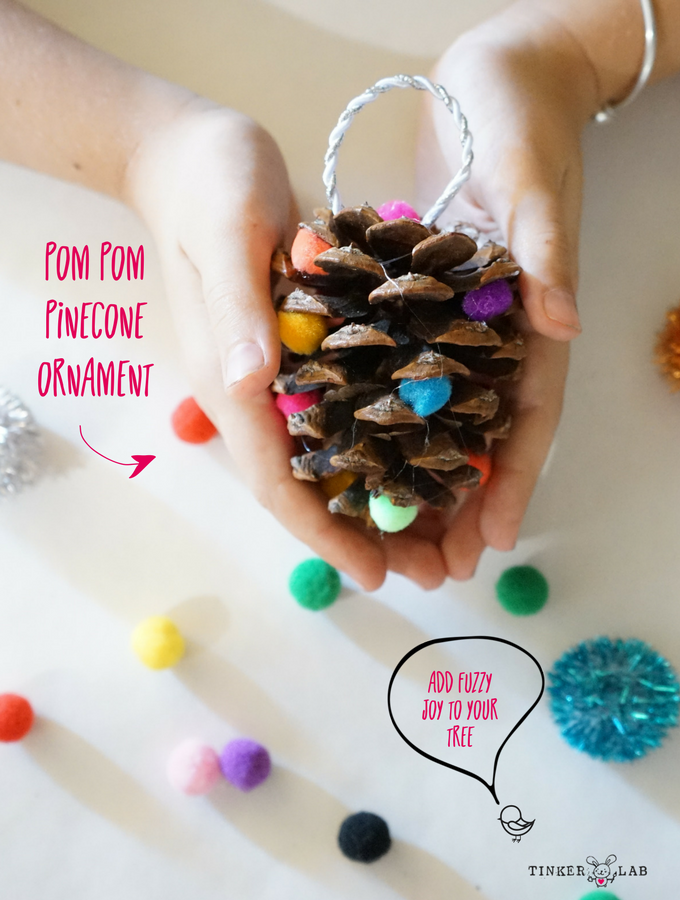
Pom Pom Pine Cone Christmas Ornament

Making Christmas crafts from pine cones is easy, seasonal, and inexpensive. This pom pom Christmas craft can be set up in just a few minutes, clean up is easy, and kids get the chance to exercise their glue gun skills (so fun!). Glue guns and kids? Don’t fret – keep reading for details on how to build glue gun confidence.

pom pom pinecone ornament supplies

Supplies

Note: This post contains affiliate links.

  • Low Heat Glue Gun such as Elmer’s Craft Bond Dual Temp
  • Pinecones
  • Small Pom Poms
  • Ribbon or Yarn

Glue guns and kids? Yes! Glue guns enable kids to bring their 3-D visions to life in a matter of seconds, while avoiding the frustration of waiting for white glue to dry. Just be sure to use a glue gun with a low heat setting like Elmer’s Craft Bond Dual Temp. I really like this glue gun because I can flip the switch to high temp (for my mama super-gluing needs) and safely back to low temp for the kids.

dog with pine cone

Let’s talk pinecones: If you live somewhere where they’re dropping everywhere like they are here in Northern California, bonus! Your pinecones can be found for free! Our new puppy loves chewing on pine cones – this one did not make it to the crafting table.

However, you may not want those lovely sap-infused, rain-drenched pinecones, and the good news is that they’re easy to find this time of year at craft stores. I found a bag of about 20 pinecones, infused with cinnamon, for just a few dollars. I like the natural rustic look, but for a beautiful holiday ornament, you could start with shimmery gold pinecones like these.

DIY kids pinecone Christmas ornament supplies

Steps

  • Clear the table and cover it with paper or a table covering if you don’t want the glue to stick to the table. I’d recommend this step if your table is a precious surface.
  • Plug in the glue gun.
  • Set up a bowl or plate of pom poms, a few pine cones, and ribbon.
  • If your child has never used a glue gun, walk through some safety steps on how to use it: don’t touch the tip and don’t touch the glue immediately after it comes out of the glue gun. Make a practice pinecone together to work out any kinks. Patience is so important with this step, so take your time if you need to.
  • Invite your child to attach pom poms to the pine cone.
  • Make a loop of yarn and glue it to the top of the pine cone.
  • Hang your ornament!

Creativity Corner

Sometimes kids will come up with their own ideas that stretch outside the bounds of what you may have in mind. I love these moments and encourage them as they help children develop their independence and imagination. If your child wants to add sequins or buttons instead of pom poms, or wants to wrap the pine cone in ribbon, go for it! This is a great opportunity for playful crafting.

easy kids pinecone Christmas ornament

Glue Gun Crafts with Kids

Scrap Wood Sculptures: Glue Gun Skill Building Activity

Build Found Object Junk Critters

More Ornaments with Kidspom pom Christmas ornaments

Pom Pom Christmas Bauble Ornament. These are so simple – just fill the bauble with pom poms!

Salt Dough Ornaments. These are gorgeous and last for multiple seasons.

Pipe Cleaner (Chenille Stem) Ornaments with beads

Stacked Felt Ornaments that teach sewing basics.

DIY Fabric Ornaments, beginning sewing project.

Thank you Elmer’s for sponsoring this post. All opinions are my own.

Filed Under: Art Activities, Christmas, Crafts, Elementary, Pre-School

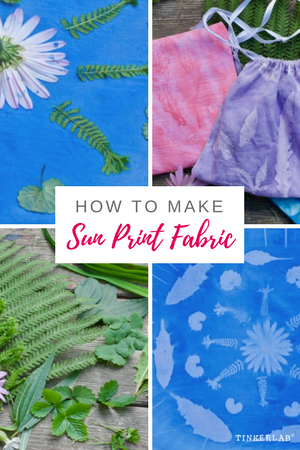
How to Make Sun Prints on Fabric

By Rachelle 8 Comments

DIY Sun print fabric with acrylic paint


I’m delighted to introduce you to TinkerLab’s newest contributor, Noreen Greimann, who shares a beautiful article on how to sun print on fabric. I adore this project because it encourages us to spend time in nature and outside, and also uses materials that you probably already have access to. How to Make Sun Print Fabric with Acrylic Paint


Growing up, I often lost myself in the natural world spending hours in the garden, the fields and by the river. These special places with all their nooks and crannies became my main source of inspiration for playing, tinkering, writing and drawing.

This hasn’t changed. And now I get to share these moments with my children and watch with amazement how they weave their experiences in nature into their play and creative activities.

Today, I’m excited to show you how to take bits and pieces of nature to create gorgeous sun print fabric that you are going to want to make over and over again.

How to sun print on fabric

Supplies

• 100% white cotton fabric
• acrylic craft paint or fabric paint (darker colors recommended)
• paint brushes
• water in a bowl or small bucket
• a flat surface outdoors to work on (e.g. driveway, old cutting board) – no wooden surface
• nature materials: petals, leaves, ferns, blades of grass, flat pebbles, etc.

How to sun print on fabric

Directions

  1. Make Paint. Dilute the paint with water at a 1:1 paint to water ratio. You want the paint to be thin enough to flow easily, but to still have enough pigment for bright colors.
  2. Wet the Fabric. Wet the fabric in a bowl of water and squeeze it out until it is no longer dripping. Lay it flat on a mat or other non-porous surface.
  3. Paint the fabric with a big paintbrush. When working with young children it is best to only use one or two colors at a time. Otherwise, the results will be rather muddy looking because little hands often can’t resist mixing all the colors together.
  4. Press the leaves and flowers. As soon as you are done painting, press the leaves and flowers top side down onto the painted fabric, making sure the edges of the leaves and flowers lie flat. The more contact with the fabric, the sharper the lines will be in the end.
  5. Place in the sun. Leave the fabric out in the sun for 1 to 2 hours. If it is really hot, it helps to mist the fabric during the first 30 minutes to an hour.
  6. Remove leaves. When the fabric is completely dry, peel off the leaves and flowers and watch the magical prints appear. Don’t the dandelion leaf prints look like fish?
  7. Set the paint. To set the paint, place the fabric in the dryer on high for 1 hour. I also recommend hand washing the first time as some of the paint may still wash out.

How to sun print on fabric

How to sun print on fabric

How to sun print on fabric

How to use sun print fabrics

The possibilities are truly endless.

  • Start with a t-shirt or pillowcase and you will have a stunning project in 2 hours.
  • Fabric pieces can be sewn into simple draw-string bags, which are perfect for holding gems, fairies, acorns, pebbles, seashells and other treasures. The fabrics also make lovely doll pillows and blankets.
  • Or how about a large bag for carrying books to the library?

How to sun print on fabric

Ready to give this a try? I hope you will enjoy this project as much as we do.


Noreen GreimannNoreen Greimann is a Natural Childhood Advocate who helps parents create a magical childhood for their children through her unique method of combining storytelling with activities. She shares her work and inspires parents on her website Entangled Harmony.

Filed Under: Art Activities, Crafts, Elementary, Elementary - 1, Summer

Shoelace Manifestos

By Rachelle 10 Comments

shoelace manifestos

We were invited by Famous Footwear to participate in their Step Forward campaign, which celebrates creativity, being our best selves, and stepping forward with confidence. I’m a big champion of encouraging self-confidence in kids, and this is a message I can easily stand behind. The TinkerLab philosophy is rooted in giving children voice, supporting their individuality, and encouraging self-expression, so of course I had to look to some kids, which happened to be my own, for direction on this project.

These are the questions that guided us:

How can we encourage children to be their best selves and step forward with confidence?

What do they care about?

What are their dreams?

i heart reading shoe beading

All sorts of ideas were brewing in my mind, mostly along the lines of painting or stenciling our shoes with brave colors or bold messages, but again, I wanted my kids to take the lead on this one. After all, following a child’s curiosity is a tenet of my philosophy as both a parent and arts educator.

So I posed this question to my girls:

“How can we celebrate our personalities through our shoes?”

And that’s when my 8-year old suggested that we make Shoelace Manifestos. 

Ohhhh, I love this idea so much, and it’s so her! 

She loves to write affirmations and positive statements in her journals, so we decided to celebrate this.

But how? She suggested square letter beads as a way to create a mini shoelace billboard of our affirmations.

#shoelacemanifesto


man·i·fes·to

/ˌmanəˈfestō/

Noun:a written statement declaring publicly the intentions, motives, or views of its issuer. (Merriam-Webster)


This quote by French fashion and shoe designer, Roger Vivier, is a lovely sentiment for this project:

‘To wear dreams on one’s feet is to begin to give a reality to one’s dreams.’ (1)


“To wear dreams on one’s feet is to begin to give a reality to one’s dreams.”


Like so many children, my kids love their sneakers, and so we all decided to bead up new shoes from Famous Footwear.

My 8-year old and I both chose classic Chuck Taylors. I haven’t owned a pair of these since college, but oh-how-I-loved-these. It’s so fun to get my feet in these again. Swoon!

My 6-year old fell madly in love with these Roxy Rizzo shoes, and practically wore them into the ground before I had a chance to shoot these photos, but it’s a sign of how much she enjoys them.

They are the cutest and get tons of compliments…especially when clean. 😉

shoe bead letters 1

We set up the shoes for inspiration, and filled a bowl with these beads.

letter shoe bead hunt

I didn’t give the kids any guidance and was curious to see where they would take this. My 6-year old spelled out NEW YORK. I asked her about it later and she told me that she loves New York. Not all the noise, but the tall buildings.

letter beads shoes new york
letter shoe beads new york chair

After lacing these up, we took them for a ride on the swing. To give them some air and speed in true New York fashion.

shoe bead swing 2

My 8-year old adores reading and came up with this message: I ❤️ READING.

i heart readingShe really does. In fact, after pulling this together, she quietly snuck away and happily curled up with a book.

i love reading shoe beads

My initials are RAD, which I love, so I knew I wanted the word RAD on one shoe, and my kids suggested SOUL for the other. They’re into puns and thought it was both meaningful and funny to play with the words soul and sole. 

rad soul shoe beads square

Yes, it’s perfect!

Make a Shoelace Manifesto

If you need a little kick-start, start here:

  1. Ask: What are you curious about? 
  2. Try to limit the beads on each shoe to six, although seven could work. “Reading” is seven letters, and barely fit on a size 3 kids’ shoe.
  3. Use these beads. Heads up: Some packages don’t come with even quantities of letters, so it’s best if you can see the beads in person.
  4. Try one of these affirmations, or use these as a point of inspiration:
    1. Smart – Cookie
    2. Kind – Kid
    3. Dream – Big
    4. I am – Strong
    5. Cre -ative
    6. Posi – tive
    7. I am – Loved
    8. I am – Kind
    9. Good – Human
    10. I ❤️ – Myself
    11. I ❤️ – Soccer
    12. I ❤️ – Dance (etc.)
  5. Take a photo of your shoes and tag it with #shoelacemanifesto

Thank you to Famous Footwear for kindly sponsoring this post. All opinions are 100% honest & completely my own.

Filed Under: Art Activities, Crafts, Elementary, Elementary - 1, Pre-School

Paper Plate Weaving | Make a Doll Hammock

By Rachelle 7 Comments

Make a paper plate weaving into a doll hammock | Kids Weaving project

Make a paper plate weaving into a doll hammock | Easy Weaving project for kids

Have you ever tried circle weaving on a paper plate? Today, I’ll both share how to make a paper plate weaving, and also how to turn that weaving into a sweet little hammock for a small doll.

My girls, ages 4 and 6, adore these hammocks, and my older daughter quickly adopted the one you see here. Check out this video of the entire process — I’ll share more a more detailed tutorial below.

Supplies for Paper Plate Weaving

Paper Plate

Yarn

Scissors

Popsicle Stick or Choptick

Kids Weaving Project | Circle Weaving Hammock for Dolls

Paper Plate Weaving Steps

Step 1: Cut notches in around the edges of the plate. This has to be an ODD number.  9 or 11 notches seems to work well.

Step 2: Wrap yarn around the paper plate. See demonstration in the video (above). Tie a knot so this doesn’t come loose.

Kids Weaving Project | Circle Weaving Hammock for Dolls

Step 3: Wrap yarn around the popsicle stick.

Step 4: Tie one end of the yarn to the center of the criss-crossed plate yarn.

Step 5: Weave the popsicle stick yarn over and under the plate yarn. Continue until you are done. You can change colors along the way by tying yarns together.

Kids Weaving Project | Circle Weaving Hammock for Dolls

Step 6: Cut the yarn from the plate

Step 7: Tie the ends of the yarn to each other so that the weaving doesn’t come undone. Add more yarn to create the long, hanging strings. (See an alternative way to tie this off in the video).

Step 8: Add a toy!

Kids Weaving Project | Circle Weaving Hammock for Dolls

Another idea!

My 4-year old noticed that turning one of these creations upside down transformed it into a jelly fish. These ends weren’t tied off, so it’s bound to fall apart eventually, but we could have easily tied them off.

Kids Weaving Project | Circle Weaving Jelly Fish

This project is part of Kids Crafts 101, a collection of crafts that are made from materials you most likely have lying around your home. Things like paper bags, cardboard rolls, string, paper plates, and cardboard. Click here to see all of the ideas in this series.

Kids Crafts 101

Yesterday’s clever idea from Anna at The Imagination Tree is to make colorful Egg Carton Flower Necklaces, and tomorrow, Jeanette of Tiny Rotten Peanuts will share how to make these delightful String Nests.

11156744_10152948700585805_575613773_n jeanette

Join the TinkerLab Community

If you were inspired by this post, you might like to sign up for the weekly TinkerLab newsletter. It’s free and we often send exclusive content and opportunities that are only available to our subscribers.

TinkerLab Newsletter

In case you blinked and missed it, TinkerLab rounds up all the great stuff on the internets on keeping you and your critters creative and wraps it up for you in a tidy newsletter! (And throws in some secret giveaways for good measure!)  – Yuliya P., San Francisco, CA

Join our community and you’ll learn:

  • How to simplify your life and make more room for creativity
  • How to make hands-on making a part of your everyday life
  • Easy, actionable ways to raise creative kids

Filed Under: Crafts

Next Page »

Copyright © 2019 - TinkerLab ® - All Rights Reserved