TinkerLab

join button

join button
  • HOME
  • ABOUT
    • ABOUT
    • FAQ
    • CONTACT
    • PRIVACY POLICY
  • ACTIVITIES
    • ART
    • SCIENCE
    • SENSORY
    • BABIES
    • TODDLERS
    • PRESCHOOL
    • ELEMENTARY
    • MONTHLY ART CHALLENGE
  • SCHOOLHOUSE
    • LEARN MORE
    • MEMBERS LOGIN
  • BOOKS
    • TINKERLAB: A HAND-ON GUIDE FOR LITTLE INVENTORS
    • TINKERLAB ART STARTS
    • CREATIVE ADVENTURES IN CURSIVE
  • BLOG
  • NEWSLETTER
You are here: Home / Archives for Play

DIY Water Wall

By Rachelle

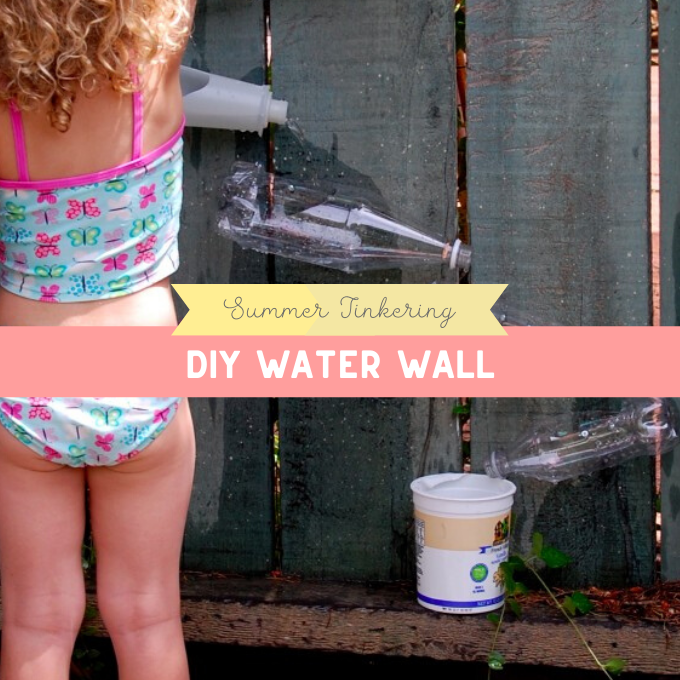
Does it feel like summer in your part of the world? It’s heating up here, and my kids have been enjoying this easy and inexpensive new backyard water feature. All you need is a nearby water source, recycled plastic bottles, and a wall to attach it to.

My older daughter helped me build this one afternoon last week while my toddler was napping. She loved the responsibility of holding the bottles steady while I drilled and took a lot of pride in our finished water wall. It’s not gorgeous, but it’s a lot of fun and an upcycler’s DIY dream.

water wall build

To replicate this upcycled playscape in your own garden or patio, I’ll break this down into some simple steps.

collection of water wall materials

DIY Water Wall Supplies

Plastic bottles

Screws (our nifty kit is from IKEA)

Drill. The one in the photo is no longer with us. Sniff. However, our brand new, favorite drill is this cordless Makita drill  (affiliate).

Exacto knife. This one (affiliate) is a good deal

DIY Water Wall Steps

With the exacto knife, cut a hole in the side of the bottle. The hole will be large enough for you to fit your hand into it so that you can easily position and drill in the screws.

score bottle and add screws

Using the exacto knife, score an “X” on the side of a bottle and push a screw through the “X” from the inside. Repeat one more time so that you have two screws poking through the bottle.

Screw the bottles to a fence or wall. Tilt them slightly downward to help the water pour through. You might have to shift the bottles around or cut the holes a bit more to make the water wall work properly. Test as you go.

water wall testing

Test it out to make sure it works. Add a bucket at the bottom to catch the water, which can then be added to plants or returned to the top of the water wall.

Invite some friends over to play.

water wall play

Set up a water-filling station and add some pitchers, watering cans, and cups.

And be prepared for eye-opening, open-ended fun.

How to make an easy summer water wall

Filed Under: DIY, Elementary, Outdoors, Pre-School, Recycled, Sensory, Summer, Toddler

DIY Pumpkin Pie Playdough

By Rachelle

Have you ever made your own play dough? While I’m a fan of store bought dough (it’s so easy!), making your own is a money saver and we can make TONS of it in minutes. And with the simple addition of a little pumpkin pie spice, our dough smells heavenly…just like pumpkin pie!

Also, this is first on our big Family Fall List of 50 things to do this autumn, so check!

Inspired by The Artful Parent’s Autumn Arts and Crafts book, The Artful Year: Autumn, we made this seasonal scent that’s perfect for autumn: Pumpkin Pie!

Pumpkin Pie Playdough Recipe…

Playdough is a wonderful material for building fine motor skills, developing imaginations through exploratory play, and supporting early engineering and building skills. This recipe rivals anything store-bought.

I used our favorite play dough recipe, which also happens to be the favorite of my daughter’s awesome preschool class (and the BEST play dough recipe, hands-down), so I’m not going to get experimental with the dough itself, but we did experiment with the spice combination. 

The dough itself takes about 20 minutes to prepare, it cooks on the stove-top, and the key ingredient is cream of tartar. If you can’t find it locally, cream of tartar is on Amazon, of course (affiliate).

Yes, you can find 2-minute dough recipes like this no-cook dough, and I’d encourage you to use them if you’re short on time, but the benefit of this recipe is that it will last for ages. Ages. I kid you not.

Click here to download the free printable pumpkin pie playdough recipe card (PDF)

Ingredients

  • 5 cups water
  • 2 1/2 cups salt
  • 3 tbsp. cream of tartar
  • 10 tbsp. vegetable oil
  • 5 cups flour
  • Food coloring or liquid watercolors
  • Pumpkin Pie Spice, or a blend of cinnamon, nutmeg, ginger, and cardamom

Steps

  1. Mix everything but the food coloring together in a large pot until somewhat smooth. It will be lumpy. Not to worry, the dough will get smoother as it cooks.
  2. Cook the dough over a low heat. Mix frequently. The water will slowly cook out of the mixture and you’ll notice it starts to take on a sticky dough appearance.
  3. Keep mixing until the edges of the dough along the side and bottom of the pan appear dry. Pinch a piece of dough. If it’s not gooey, the dough is ready.
  4. Place the dough on a counter top or large cutting board or cooking tray that can withstand a little food coloring.
  5. Knead the warm dough until it’s smooth and then divide it into the number of colors that you’d like to make. We divided our in half: one orange and the other white.
  6. Flatten the ball, add a little bit of food coloring, and knead it in. Add more food coloring to get the desired shade.
  7. Store the dough in a large Ziplock bag or sealed container. Unused, it’ll keep for months.
"Smells Amazing" Pumpkin Pie Play Dough | TinkerLab.com

After we made the dough, I placed it on the counter to cool. Meanwhile, my 2-year old worked away at pinching out a real pie crust.

"Smells Amazing" Pumpkin Pie Play Dough | TinkerLab.com

When the dough was cool to touch, we squeezed orange liquid watercolors on half of it and then kneaded it in. For this step, be sure to mix on a surface that won’t absorb the watercolors. My 4-year old wanted to make half the dough orange and half of it white.

"Smells Amazing" Pumpkin Pie Play Dough | TinkerLab.com

Although we had planned to use a jar of pumpkin pie spice in the dough, my 4-year old was curious about using whole spices that we just bought, so we pulled out the coffee grinder and gave it a very loud whirl. Fun! I don’t have a proper nutmeg grinder, but this seemed to do the trick. And the smell of cardamom — I absolutely love it.

We experimented with the spice blend by adding the different spices, first quite cautiously and then rather liberally, and in different combinations. I learned that my 4-year old isn’t too crazy about the smell of cardamom, but loves cinnamon.

"Smells Amazing" Pumpkin Pie PlayDough | TinkerLab.com

My 2-year old was very happy, however, to shake-shake-shake the pie spices all over her gigantic mound of dough. Can you imagine how yummy our kitchen smelled?

After all this cooking, it was time to bake! At this point, our orange and white/tan doughs marbled into something lovely, and we got busy making small cakes and setting them out to eat on a 3-tier plate server.

But, don’t just take it from me that this play dough is awesome. Kelly from Wonder & Create Art Studio tested the playdough with her kids and says, “To get a fall fever fix in without donning a sweater or firing up the oven, make the @tinkerlab Pumpkin Pie Playdough recipe! It smells, feels and looks divine! Thanks, Rachelle, for this recipe and the wonderful emails you send!”

And then she kindly shared photos from their creative play session. So inspiring! Take a look…

The cotton ball whipped cream is genius, don’t you think?

Make mini pumpkins with fork tines and pipe cleaners. Awww.

More Fall Activities

The Great Big Family Fall List (print this for the fridge!)

More Playdough Recipes

Rainbow Play Dough, Tinkerlab

Cloud Dough, TinkerLab

Gluten-free Cloud Dough, TinkerLab

No-cook Cinnamon Playdough, The Imagination Tree

Glowing Play Dough, TinkerLab

Masa (Corn Flour) Play Dough

Downloadable (Free) Playdough Recipe Book, Nurture Store

Candy Cane Play Dough, Artful Parent

Filed Under: Art Activities, DIY, Dough, Fall, Imagination, Kitchen, Pre-School, Sensory, Toddler Tagged With: autumn, dough, fall, playdough

No Cook Playdough

By Rachelle

no cook playdough recipe

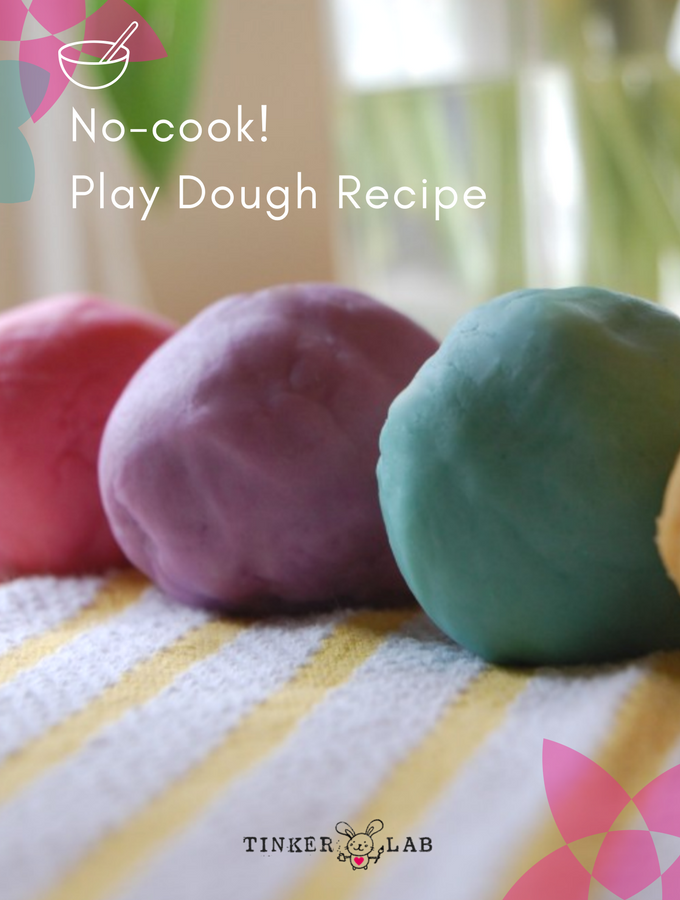
Would you like to make the best no cook playdough? One that will last for months and doesn’t require stovetop preparation?

the best no cook playdough

After making what I consider the best play dough recipe for a few years now without too many changes, I wanted to see if we could get the same results without using the stove.

I love drinking tea, and invested in an amazing BPA-free electric kettle, which seemed to be just the tool to take this play dough recipe off the stove top.

no cook playdough tea kettle

So I did some experimenting, and low and behold — if you want to go rogue, the original recipe can be even easier and still deliver the amazing dough that we all love. Here you go…

Supplies

  • 1 1/4 c. salt
  • 1 1/2 tbsp. cream of tartar 
  • 2.5 cups flour
  • 5 tbsp. vegetable oil
  • 2.5 cups water
  • Food coloring or liquid watercolors. I’m a fan Sax Concentrated Liquid Watercolors and Wilton Icing Colors, which make gorgeous shades of play dough to match any occasion, mood, or toddler request.

Directions

  1. Mix the first three ingredients together
  2. Boil water
  3. Mix the water and oil together in a small bowl
  4. Add the wet ingredients to the dry ingredients and mix until the dough comes together.

Filed Under: Art Activities, Clay, Dough, Elementary - 1, Pre-School, Recipe, Sculpture, Sensory, Sensory, Toddler

Easy No Cook Playdough

By Rachelle

Easy No Cook Playdough | TinkerLab.com

This Easy No Cook Playdough is made with hair conditioner and corn starch (aka corn flour). It comes together quickly and encourages imaginative play - awesome stuff! |TinkerLab.com

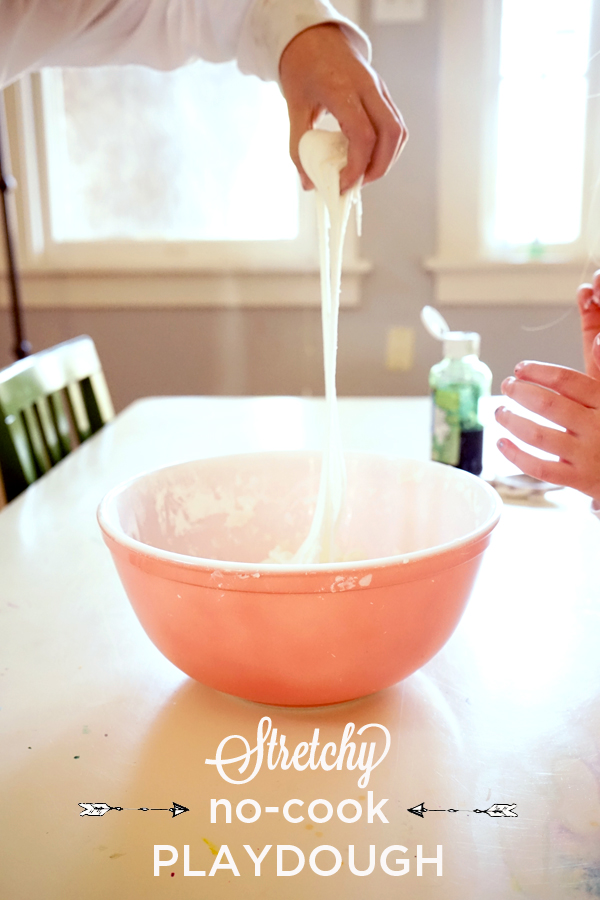
It’s been a while since we’ve made this spectacularly simple no cook playdough, and then I realized that the recipe hasn’t been shared here. I was first introduced to this easy no cook hair conditioner playdough recipe by Anna of The Imagination Tree, in her recipe for Creamy Coconut Playdough. Do check out her blog if you have or work with small children — it’s a gold mine!

The ingredients are beyond simple, they come together quickly, and the resulting dough provides children with wonderful sensory and imaginative world experiences. The texture is different from everyday playdough (see the link below to the Best Playdough Ever) – it’s stretchier and a bit stickier. If you’re short on time or have these basic ingredients on hands, this playdough could be for you!

One of my favorite things about introducing a new batch of dough to the kids is seeing how they interpret it. One day they’re interested in building a play bakery around it and another they turn it into horse stables.

This playdough won’t last for more than a day, so if you’re looking for a long-lasting play dough, you’ll want this recipe for the Best Playdough Ever (seriously – it’s that good).

So, without further ado…

This Easy No Cook Playdough is made with hair conditioner and corn starch (aka corn flour). It comes together quickly and encourages imaginative play - awesome stuff! |TinkerLab.com

How to make this easy, no cook playdough

Supplies:

  • 1 cup hair conditioner: I chose Tresemme Naturals Nourishing Moisture Conditioner (affiliate) for two reasons. One, it’s reasonably priced, and two, it’s silicone-free and dye-free, so I could feel okay with my kids and their friends playing with it.
  • 2 cups corn starch (also known as corn flour)
  • Optional: Liquid watercolors (affiliate) or food coloring

Just 2 Ingredients!! DIY Stretchy Hair Conditioner Playdough | TinkerLab.com

Steps

  1. Mix the first two ingredients in a bowl with a spoon. The mixture should not be sticky. Add a tiny bit more cornstarch if your dough feels sticky. Adjust as necessary.
  2. Add a few drops of food coloring or liquid watercolors. Mix.
  3. Form the dough into a ball and play!
  4. Add rolling pins, small toys, muffin tins, or popsicle sticks and encourage imaginative play. More playdough tool ideas can be found in this post, 3 Essential Playdough Tools and in Playdough Tool Ideas. 

A Note on the Scent

This no cook playdough has a lovely soapy smell. If you’re smell-sensitive, be sure to use a hair conditioner that you enjoy the smell of. I’m cost-conscious, and we made this another time with a cheaper conditioner. The dough turned out great, but I couldn’t escape the saturated, artificial smell of it, and could not wait to throw it out. Wah. I enjoyed the smell of this Tresemme conditioner, and as you’ll read in the Amazon reviews (link above), a LOT of people are happy with this product. Bonus: leftover conditioner can go right into your shower!

This Easy No Cook Playdough is made with hair conditioner and corn starch (aka corn flour). It comes together quickly and encourages imaginative play - awesome stuff! |TinkerLab.com


Filed Under: Clay, Sensory Tagged With: playdough

Play with Gelatin | from 150+ Screen-Free Activities for Kids

By Rachelle

150 Screen-Free Activities for Kids | TinkerLab.com

Play with Gelatin | from 150+ Screen-free Activities for Kids

Have you ever found yourself so busy that you’ve lost track of the things that keep you sane? A couple weeks ago I was preparing for a keynote talk in the little bits of free time that crop into my week. Preparing for this talk was an amazing experience for a few reasons:

  1. I had the chance to speak with 250 undergraduate education students about the importance of arts education
  2. It helped me hone in on my point of view on this beloved topic (Cliff Note version — Because artists think like inventors, an arts education has the capacity to build innovators). Hopefully I’ll have more for you about the keynote soon.

The talk was a success, but the hardest part about this busy time is that I put so many things on the back burner, including all of the fun activities that this blog is built upon. My kids are now largely self-sufficient when it comes to making and inventing, but they also love to spend time tinkering with me.

And so, within minutes after coming home from the talk, my 4-year old and I pulled out 150+ Screen-Free Activities for Kids (affiliate) and got busy making up a big batch of colorful gelatin. Why?

So that we could play with gelatin, of course!

150+ Screen-Free Activities for Kids is a wonderful recipe and activity book that’s filled with “the very best and easiest playtime activities from FunAtHomeWithKids.com“. The author, Asia Citro, is an experience teacher with a strong science and education background, who is here to make parenting a little easier and a lot more fun with her new book. She also happens to be a friend of mine, and I think she’s even more rad now that I have my hands on her amazing book.

To give you a sense of what’s inside, the book includes…

  • 5 Slime recipes
  • 13 Dough recipes
  • 9 Paint recipes
  • 17 Activity ideas for small world play
  • 16 Simple Sensory Activities (the project I’m sharing today is from this category)
  • 18 Do it yourself Toys
  • Asia offers tons of suggested variations for many of the activities. For the gelatin project alone, she offers six variations including fizzing gelatin and frozen reusable gelatin)

Play with Gelatin | from 150+ Screen-free Activities for Kids

How to Make Gelatin

(Note: This post contains affiliate links)

My older daughter and I made this recipe a few years ago, with a slightly different twist that was built around injecting clear Jell-o with colored water, and it was fun to revisit this with my little one (who’s growing way too fast, by the way!).

  1. Pour one cup of cold water into a mixing bowl
  2. Sprinkle 4 packets of Knox Gelatine over the cold water. Let it rest for one minute.
  3. Add 3 cups of hot water to the bowl and stir until the gelatin dissolves.
  4. Mix food coloring or liquid watercolors into the gelatin mixture.
  5. Coat another mixing bowl with cooking spray or oil.
  6. Add plastic (washable) toys.
  7. Pour the gelatin mixture over the toys.
  8. Place in the fridge for about 3 hours, or until it sets.

Play with Gelatin | from 150+ Screen-free Activities for Kids

How to Play with Gelatin

  1. Remove gelatin from the mold. I ran a dull knife around the edges to help release the gelatin.
  2. Plop it onto a tray
  3. Excavate your toys
  4. Play with gelatin
  5. Melt it all down an refrigerate again for more gelatin play.

The last time I shared this project some readers found it ironic that we submerged toy animals in gelatin. I know, I thought about that too. If you’re not comfortable working with animal-based gelatin, this vegan jelly seems like a great option.

Play with Gelatin | from 150+ Screen-free Activities for Kids

Asia’s book, by the way, is fabulous. Go on and give it a look-see. And take a peek at my new book, too, while you’re there!

More Sensory Play Ideas

Should food be used in preschool sensory activities?

Make colored rice

Sensory play for babies

Sensory play with tapioca pearls

Sensory play with shredded paper

Sensory experience: Water Bead exploration

Sensory activity: Wheat berries

Sensory activity: Wet paper

Filed Under: Sensory

Preschool Art | Make Colored Rice

By Rachelle

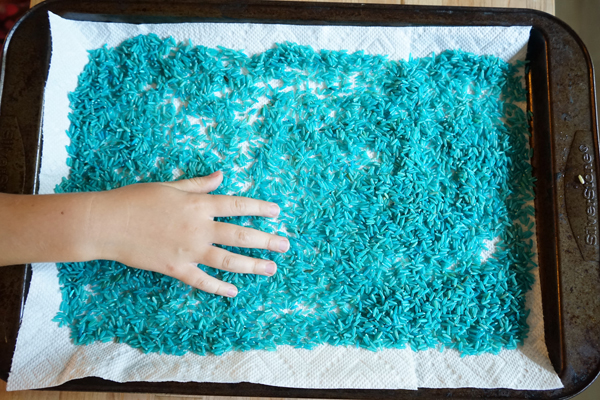
After seeing so much lovely colored rice all over my Pinterest feed for ages, it was high time that we created our own colorful rice. And you, too, can make your own colored rice for an afternoon of sensory play or for filling clear jars with layers of rainbow rice like you see here.

Preschool Art: How to make Colored Rice

Why Colored Rice is Worth Making

  • It’s a natural play material
  • Kids love the sensory experience of sifting it through their hands
  • It’s economical
  • The supplies probably already live in your pantry
  • Kids can help make it
  • It can last a looooong time

Preschool Art: Colored Rice

Supplies for Colored Rice

  • White or Brown Rice
  • Vinegar
  • Food Coloring
  • Zip-up plastic bags or bowls and spoon for mixing the colors

TinkerLab tips

Can we use brown rice?

We used brown rice for this activity, and the colors are still vibrant.

What’s the rice : vinegar ratio? 

For each color that we made, we used 1 cup of rice and 1 teaspoon of vinegar. That’s the ratio that you’ll want to work with (or experiment — we encourage that too!).

But rice is Food!! 

If you’re concerned about wasting food, check your pantry for old rice. That’s what we did, and low-and-behold, we had a bag that expired last year. Eeep. I wish we hadn’t missed the expiration date, but at least we could put that rice to good use!

Will my kids actually enjoy this?

Yes, I bet they will! I try to get my own kids involved in all the steps of our projects, and they enjoyed everything from this ro-sham-bo face-off to decide who would make which color of rice to finally playing with their colorful creation.

Preschool Art: Colored Rice

If you’d like to make this recipe, simply click ‘Print” and you can save this in your recipe file.

Preschool Art | Make Colored Rice
Author: Rachelle | TinkerLab.com
Prep time: 10 mins
Cook time: 24 hours
Total time: 24 hours 10 mins
Make your own colored rice for sensory play or art-making. This recipe makes one cup of colorful rice. Add more rice for more colors.
Ingredients
  • 1 cup White or Brown Rice
  • 1 teaspoon Vinegar
  • 1/8 + teaspoon Food Coloring
  • Zip-up plastic bags or bowls and spoon for mixing the colors
Instructions
  1. Fill a zip-up bag with 1 cup of rice and 1 teaspoon of vinegar.
  2. Scoop or pour about 1/8 teaspoon food coloring into the bag.
  3. Zip the bag shut
  4. Squeeze the bag and mix the rice all around until the food coloring is well distributed
  5. Add more food coloring to reach the desired color.
  6. Pour the colored rice onto a cookie sheet. Spread it out to expedite drying time. To absorb the moisture and help the rice dry more quickly, line the tray with a paper towel or towel.
  7. The rice take between 2 hours and a full day to dry, depending on your climate and humidity.
3.2.1311

How to Make Colored Rice

Preschool Art: Colored Rice

  • Fill each zip-up bag with 1 cup of rice and 1 teaspoon of vinegar.
  • Scoop or pour about 1/8 teaspoon food coloring into the bag.
  • Zip the bag shut

Preschool Art: Colored Rice

  • Squeeze the bag and mix the rice all around until the food coloring is well distributed
  • Pour the colored rice onto a cookie sheet. To absorb the moisture and help the rice dry more quickly, line the tray with a paper towel or towel.

Preschool Art: Colored Rice

We ran out of cookie sheets, so we divided one in half by pulling a paper towel wall up between two colors. Our rice dried in about 5 hours. The rice will dry take up to 24 hours to dry, depending on your climate and humidity.

More Colored Rice

Check back tomorrow and we’ll share a Creative Table set-up using colored rice!

This recipe was inspired by Rainbow Rice via Happy Hooligans

Make a Fall-themed rice sensory bin, via Kids Activities Blog

Side-by-side comparison of dying rice with food coloring and liquid watercolors, via Fun at Home with Kids


Filed Under: Pre-School, Recipe, Sensory Tagged With: play, recipe, rice, sensory

Next Page »

Copyright © 2021 - TinkerLab ® - All Rights Reserved - Privacy Policy