TinkerLab

  • HOME
  • ACTIVITIES
    • ART
    • SCIENCE PROJECTS
    • SENSORY
    • BABIES
    • TODDLERS
    • PRESCHOOL
    • ELEMENTARY
    • MONTHLY ART CHALLENGE
  • BOOKS
  • ABOUT
    • START HERE
    • ABOUT RACHELLE
    • FAQ
    • PRIVACY POLICY
    • IN THE MEDIA
    • SUBSCRIBE
    • LOCAL NEWSLETTER
    • CONTACT
  • CLASSES
  • SHOP
  • BLOG
You are here: Home / Archives for recipe

The Best Homemade Playdough Recipe (super soft, lasts for months)

By Rachelle 87 Comments

homemade playdough recipe

At TinkerLab, we love making playdough, and today we’re sharing what is easily the BEST playdough recipe ever. I’ve been making this recipe for over seven years, and haven’t looked back since. The recipe was handed down to me by a preschool teacher, and it can’t be beat. I’m so confident about this recipe, in fact, that there’s a copy of it in my best-selling book, Tinkerlab: A Hands-on Guide for Little Inventors.

The best playdough recipe | How to Make play dough | Tinkerlab.com

Why this is the best playdough recipe

  • It’s easy to make (see our no-cook version of the recipe below)
  • It will last for months if stored in a sealed container or bag
  • It’s inexpensive. Compare it to store bought dough and you are saving loads of cash.
  • The texture is divine. It’s soft, pliable, and fun to work with.

Our Plan

My plan was to make a simple batch of play dough to replace the sparkly dried out purple stuff that happily met our cookie-making, glitter infusing, practice cutting, snowman-making needs over the past two months. I asked my daughter what color she would like this time around, and she answered with…

ALL of them.

The best playdough recipe | How to Make play dough | Tinkerlab.com

Ahem. Right.

The way I have always made playdough requires that I add the color to the whole batch while it’s cooking, making it difficult to make multiple colors. But by some lucky, happy accident we managed to add the ingredients in the wrong order, which is no doubt the result of making dough with a two year old while chatting with my mother-in-law and goo-gooing at my baby! But, as that same luck would have it, I think we landed on the best playdough recipe yet. The texture is buttery and I was able to deliver on the multiple colors request.

And this ingredient, my friends, is the secret to having strong, smooth playdough that won’t crumble.

So, without further ado…The Best Playdough Recipe

The best playdough recipe | How to Make play dough | Tinkerlab.com

Ingredients

This post contains affiliate links

  • 2.5 cups water
  • 1 1/4 c. salt
  • 1 1/2 tbsp. cream of tartar 
  • 5 tbsp. vegetable oil
  • 2.5 cups flour
  • Food coloring or liquid watercolors. I’m a fan Sax Concentrated Liquid Watercolors and Wilton Icing Colors, which make gorgeous shades of play dough to match any occasion, mood, or toddler request.

Steps

  1. Mix everything but the food coloring together in a large pot until somewhat smooth. It will be lumpy. Not to worry, the dough will get smoother as it cooks.
  2. Cook the dough over a low heat. Mix frequently. The water will slowly cook out of the mixture and you’ll notice it starts to take on a sticky dough appearance. Keep mixing until the edges of the dough along the side and bottom of the pan appear dry. Pinch a piece of dough. If it’s not gooey, the dough is ready.
  3. Place the dough on a counter top or large cutting board that can withstand a little food coloring.
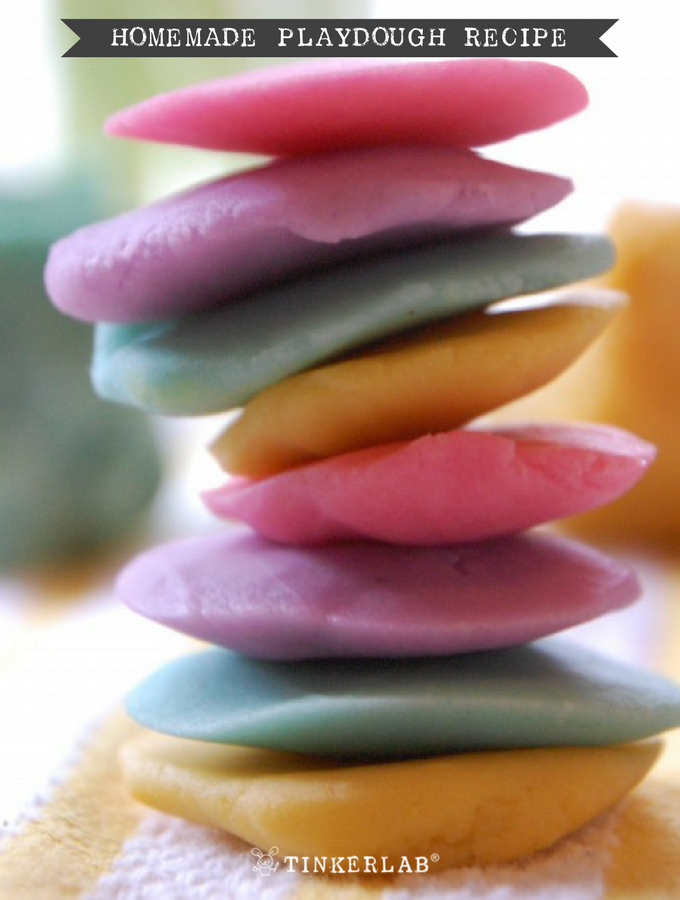
  4. Knead the warm dough until it’s smooth and then divide it into the number of colors that you’d like to make. I divided mine into four balls, flattened each of them, added a little bit of food coloring or liquid watercolors, and then kneaded it in. I added more food coloring to get the desired shades of yellow, pink, teal, and lavender.
  5. Play with the dough right away or store it in a large Ziplock bag or sealed container. Unused, it’ll keep for months. For play dough tool ideas, you can read this post.

The best playdough recipe | How to Make play dough | Tinkerlab.com

There you have it, rainbow play dough (aka the best playdough recipe ever).

No-cook Best Playdough Recipe:

the best no cook playdoughI’ve been making this dough for a few years now without too many changes. After investing in this amazing BPA-free electric kettle, I was wondering if I could make this playdough off the stove top. So I did some experimenting, and low and behold — this recipe can be even easier and still the amazing dough that we all love. Here you go: No-Cook Playdough recipe.

homemade playdough recipe

More Playdough Recipes

How to Make Cloud Dough, the easiest dough recipe that calls for oil and flour.

How to Make Goop with just cornstarch and water.

Make amazing scented pumpkin spice playdough.

How to make Gluten-free Cloud Dough

Glowing Playdough

DIY Masa Playdough, made with masa harina

How to make Salt Dough with just salt, flour, and water.

What Else Can you do with Liquid Watercolors?

Liquid watercolors can be used for so many other recipes and projects such as:

  • Painting with Straws
  • Doily and Watercolor paintings
  • Marbleized Paper
  • Colorful Goop, a seriously amazing sensory experience

the best homemade play doh recipe

Filed Under: Dough, Pre-School, Recipe, Sculpture, Toddler Tagged With: play dough, rainbow, recipe

Preschool Art | Make Colored Rice

By Rachelle 8 Comments

After seeing so much lovely colored rice all over my Pinterest feed for ages, it was high time that we created our own colorful rice. And you, too, can make your own colored rice for an afternoon of sensory play or for filling clear jars with layers of rainbow rice like you see here.

Preschool Art: How to make Colored Rice

Why Colored Rice is Worth Making

  • It’s a natural play material
  • Kids love the sensory experience of sifting it through their hands
  • It’s economical
  • The supplies probably already live in your pantry
  • Kids can help make it
  • It can last a looooong time

Preschool Art: Colored Rice

Supplies for Colored Rice

  • White or Brown Rice
  • Vinegar
  • Food Coloring
  • Zip-up plastic bags or bowls and spoon for mixing the colors

TinkerLab tips

Can we use brown rice?

We used brown rice for this activity, and the colors are still vibrant.

What’s the rice : vinegar ratio? 

For each color that we made, we used 1 cup of rice and 1 teaspoon of vinegar. That’s the ratio that you’ll want to work with (or experiment — we encourage that too!).

But rice is Food!! 

If you’re concerned about wasting food, check your pantry for old rice. That’s what we did, and low-and-behold, we had a bag that expired last year. Eeep. I wish we hadn’t missed the expiration date, but at least we could put that rice to good use!

Will my kids actually enjoy this?

Yes, I bet they will! I try to get my own kids involved in all the steps of our projects, and they enjoyed everything from this ro-sham-bo face-off to decide who would make which color of rice to finally playing with their colorful creation.

Preschool Art: Colored Rice

If you’d like to make this recipe, simply click ‘Print” and you can save this in your recipe file.

Print
Preschool Art | Make Colored Rice

Rating  5.0 from 1 reviews

Prep time:  10 mins

Making time:  24 hours

Total time:  24 hours 10 mins

Make your own colored rice for sensory play or art-making. This recipe makes one cup of colorful rice. Add more rice for more colors.
Supplies
  • 1 cup White or Brown Rice
  • 1 teaspoon Vinegar
  • ⅛ + teaspoon Food Coloring
  • Zip-up plastic bags or bowls and spoon for mixing the colors
Steps
  1. Fill a zip-up bag with 1 cup of rice and 1 teaspoon of vinegar.
  2. Scoop or pour about ⅛ teaspoon food coloring into the bag.
  3. Zip the bag shut
  4. Squeeze the bag and mix the rice all around until the food coloring is well distributed
  5. Add more food coloring to reach the desired color.
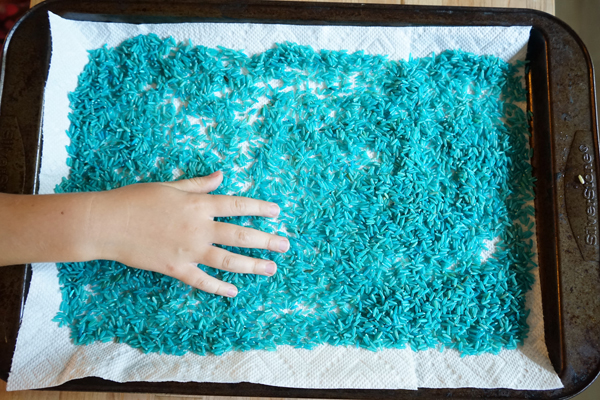
  6. Pour the colored rice onto a cookie sheet. Spread it out to expedite drying time. To absorb the moisture and help the rice dry more quickly, line the tray with a paper towel or towel.
  7. The rice take between 2 hours and a full day to dry, depending on your climate and humidity.
3.2.1311

How to Make Colored Rice

Preschool Art: Colored Rice

  • Fill each zip-up bag with 1 cup of rice and 1 teaspoon of vinegar.
  • Scoop or pour about 1/8 teaspoon food coloring into the bag.
  • Zip the bag shut

Preschool Art: Colored Rice

  • Squeeze the bag and mix the rice all around until the food coloring is well distributed
  • Pour the colored rice onto a cookie sheet. To absorb the moisture and help the rice dry more quickly, line the tray with a paper towel or towel.

Preschool Art: Colored Rice

We ran out of cookie sheets, so we divided one in half by pulling a paper towel wall up between two colors. Our rice dried in about 5 hours. The rice will dry take up to 24 hours to dry, depending on your climate and humidity.

More Colored Rice

Check back tomorrow and we’ll share a Creative Table set-up using colored rice!

This recipe was inspired by Rainbow Rice via Happy Hooligans

Make a Fall-themed rice sensory bin, via Kids Activities Blog

Side-by-side comparison of dying rice with food coloring and liquid watercolors, via Fun at Home with Kids


Filed Under: Pre-School, Recipe, Sensory Tagged With: play, recipe, rice, sensory

Our Favorite Homemade Paint Recipes

By Rachelle Leave a Comment

Favorite (and easy) homemade paint recipes for kids | TinkerLab.com

Have you ever made your own paint?

6 Favorite Homemade Paint Recipes for Kids  |  TinekerLab.com

If not, these homemade paint recipes are just the thing to get you started. You’ll be surprised at just how easy, fast, and affordable making your own paint can be.

Here are some of the reasons that we love to make our own homemade paint:

  1. It’s just plain fun to make things that you’d otherwise buy in the store.
  2. It can save you money.
  3. It can give you peace of mind to know that the ingredients in homemade paints are child-friendly.
  4. Making their own art materials teaches children to be resourceful and inventive.
  5. It could save you a trip to the art store.

6 Favorite Homemade Paint Recipes for Kids  |  TinekerLab.com

Here are six of our favorite homemade paint recipes:

Puffy Sparkle Paint: Made from salt, flour, and water, this paint dries a little puffy and gets a bit of sparkle from the salt. Fill an empty glue bottle with this paint, and squeeze designs onto paper.

Finger Paint: A simple recipe of flour and water, heated over the stove, this goopy paint feels great on the hands.

Egg Tempera Paint: This very easy paint, made from egg yolks, dries with a beautiful sheen can also be a great lesson in how the Renaissance painters originally painted.

Microwave Puffy Paint: Squeeze this paint onto paper and then pop the artwork in the microwave for a truly puffy result. Very cool!

Sweetened Condensed Milk Paint: This may be the most delicious paint recipe yet!

Invisible Ink: Made from citrus juice, this is a fun one for little sleuths and spies.

Bubble Paint: A mixture of dish soap, water, and tempera paint makes this magical solution that can be used to form bubbles on the surface of paper.

6 Favorite Homemade Paint Recipes for Kids  |  TinekerLab.com

More Homemade Art Materials

Jean Van’t Hul of The Artful Parent created this fantastic resource of 35 Homemade Art Materials Kids Can Make.

If you’re looking for a homemade paint recipe that’s not on this list, please add it in the comments and we will work hard to bring you what you’re looking for!


Filed Under: Art Activities, Painting Tagged With: homemade, kids, paint, recipe

Make Your Own Birthday Cake

By Rachelle 9 Comments

kids use rotary mixer

kids diy make and bake birthday cake

If you know a little bit about me and my parenting philosophy, you’ll know that I welcome opportunities to get my children into DIY mode. The only way they’re going to learn how to do something is by getting involved, so I may give them a few pointers and then I’ll step back and let them take the lead.

My youngest, R, who I sometimes refer to here as Baby Rainbow, is no longer a baby. Sniff. She just turned two! When we’d ask her what she wanted for her birthday, her response was consistently “vanilla cake.”

Not only do I also drool over vanilla cake, but this simple request made for a totally low-key, low-stress birthday that I look forward to repeating again with future birthdays.

Baking Cakes

To get started, my 4-year old, N, and I mixed up one box of vanilla cake mix from Trader Joes. It doesn’t get easier than that, and the ingredients are actually fairly healthy.

We pulled out our rotary hand mixer/egg beater, which my daughter uses any chance she can get. Not only is it fun for kids to use, but it gets them involved in the kitchen and it does wonders for developing hand-eye coordination and motor skills.

kids use rotary mixer


After she mixed the batter up, we divided it into two 9-inch cake pans and cooked as directed on the box.

Meanwhile, we mixed a batch of our favorite frosting: Buttercream Frosting. Oh-my-goodness. If you’ve never made it before, it’s not only easy, but it’s also highly addictive. Yum.

My kids are always promised a beater to lick at the end of baking, which helps keep hands out of the bowl while we’re assembling.

Once the cakes cooked and cooled, we popped them out of the pans and started in on our grand assembly plan.

Cake Recipes

My 2-year old’s request: Vanilla Cake

My 4-year old’s plan: Two-tiered vanilla cake with vanilla frosting and strawberries in the middle layers. The top will be covered with sprinkles, Happy Birthday letters, a “2” birthday candle, and fairy cupcake toppers (basically, everything we had in the cabinet).

frosting cake with children

Decorating Step 1: The kids used butter knives to cover the bottom layer with raspberry jam (this was my suggestion, and they did not protest). Then we added a thick layer of vanilla frosting.

kids decorate cake

Frosting for Cake

Decorating Step 2: My 4-year old thinly sliced the strawberries and the kids layered them on the cake.

frosting cake with kids

We placed the second cake on top of the strawberry layer, and then covered the whole thing with frosting. When you’re working with children, it helps to value the process over the product. You can’t worry too much about how the cake is going to look. It’s a bonus, of course, if it looks amazing, but the important thing is that they have take pride in make something amazing happen.

cakes

We started gussying the cake up and R requested jelly beans. There were only six left in the box, and she eagerly plunked them into a corner of the cake. This ended up being her piece!

kids bake in the kitchen

And when we were done, they got the frosting bowl as a bonus.

Experiments

For more of our kid-led cooking experiments: How to Invent a Recipe with Kids, Cooking with Toddlers, Cooking with Kids (exploring butter and rosemary)

Also, one of my friends and favorite bloggers, Jean Van’t Hul of The Artful Parent recently wrote about a birthday cake her daughter made: A Kid Made Birthday Cake. I think my kids would feel right at home in her house!

DO YOU LIKE TO COOK WITH YOUR CHILD? WHAT ARE YOU FAVORITE COOKING-WITH-KIDS RECIPES?


Filed Under: Creativity, Elementary, Exploration, Kitchen, Pre-School Tagged With: cake, cooking, recipe

How to Make Paper

By Rachelle 21 Comments

How to make paper with kids | TinkerLab

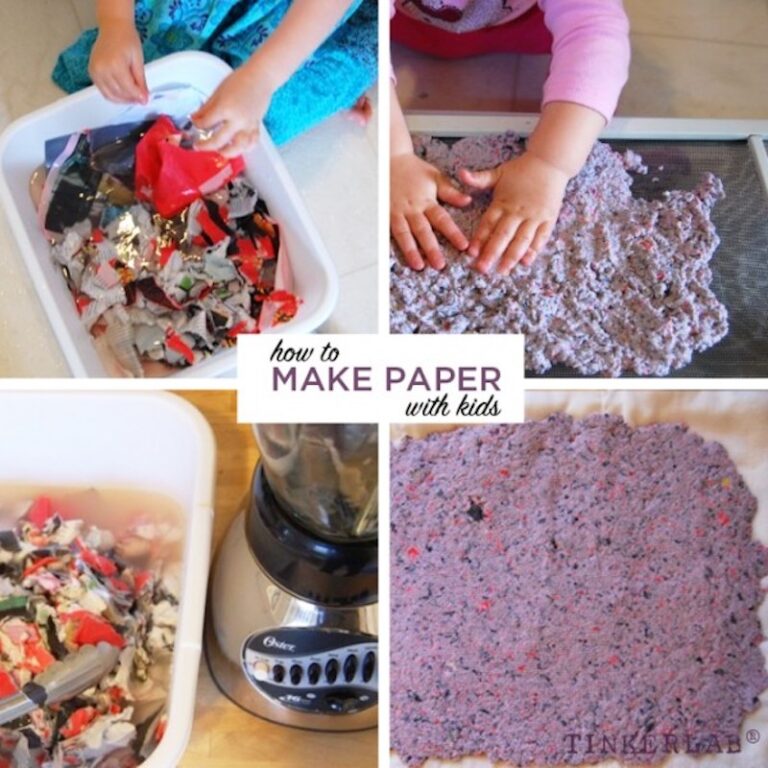
Making paper with kids is a rewarding experience, and today I’m going to share how to make paper with kids. These steps work for anyone interested in how to make paper, and I give specific tips and advice on how to make paper with kids (even toddlers!)

how to make paper with kids

Supplies: How to Make Paper

This post contains affiliate links

  • Window Screen. This sliding window screen is economical and reusable.
  • Two Plastic Wash Tubs  or similar
  • Washcloth/rag/burp cloth/large piece of felt
  • Water
  • Torn paper from newspaper, tissue paper, magazines, etc. Be sure that it’s staple and tape-free
  • Blender  <<This is my favorite economical workhorse machine. 
  • Small seeds (optional)

Instructions: How to Make Paper

  1. Tear the paper into tiny strips, about 2″.
  2. Place your window screen on top of one of the plastic tubs
  3. Place your window screen on top of one of the plastic tubs
  4. Add paper to the blender, cover it with water, and run the blender on a low speed. Since you will squeeze all the water out of the paper pulp, you can’t really have too much water. If the blender doesn’t move easily, add more water.
  5. Run the blender a little bit faster until you get the paper mixture into a nice, smooth pulp. Ours is kind of chunky because my kids wanted it that way. Yours can be smoother.
  6. Spread the pulp thinly and uniformly across the screen and then layer a cloth diaper or towel on top to absorb the extra water, while also pushing the water through the screen into the tub. Get the kids involved.
  7. Place one hand firmly on top of the cloth while you flip the screen over onto a table or countertop that can handle water.
  8. Remove the screen and put the cloth with paper pulp in a spot where it can dry, undisturbed, for about a day. The thicker the paper, the longer it will take to dry.

Making paper with kids - so easy!

How to make paper with kids

Making paper with kids requires some patience and preparation, but it’s not tricky and the process is worth exploring with children or anyone who’s curious about how to make paper.

After my toddler created a sensory bin full of paper and water, I saw an opportunity to upcycle that mushy paper pulp into some new-to-us paper. We had most of the materials handy, but had to make a trip to the hardware store to buy a small window screen (affiliate)

To get into the spirit and expand our knowledge of paper making, we watched a Mr. Roger’s episode about paper making. You can watch it, too!

If you like this video you’ll also love learning about how crayons are made.

how to make paper with kids

Let’s start with the materials…

how to make paper with kids

  1. Mix paper with water

how to make paper with kids2. Place the screen over tubMake paper with a blender

3. Put wet paper in the blender

how to make paper

4. Blend the paper

My toddler wanted to play with the pulp right away. She squeezed it, scooped it, and carried bowls full of pulp into the living room. Fun!

how to make paper with kids

5. Spread the paper pulp over the screen

how to make paper

6. Press the pulp down and squeeze out the water

how to make paper

7. Allow the paper to dry. This could take a day or two depending on humidity and thickness of the paper.

Make paper with a screen

8. Remove your paper and cut it into pieces, draw on it, or use it in art making.

Because our pulp was on the thick side, the paper doesn’t look like typical thin paper. As a result of this, your child may wonder if they really made paper! This is a great opportunity to discuss and question how paper manufacturers might get such thin paper.

What can you do with homemade paper?

We haven’t done much with it yet, but we’ll probably write on it with permanent markers or paint with watercolors. Because we embedded seeds in the pulp, we could cut these up and give them away to friends, with the invitation to plant them in their gardens.

Benefits of Making Paper

Making paper teaches children how one of our most ubiquitous materials — PAPER — is made, and it’s also a fun sensory project for kids of all ages.

More Handmade Paper Inspiration

Allison of No Time for Flashcards used and Immersion Blender to make Recycled Paper Hearts.

Kristi of Creative Connections for Kids made Wildflower Paper Ornaments (using the same screen as us!).

Melitza of Play Activities made Earth Day Seeded Paper.

How to make paper with kids | TinkerLab

Filed Under: Art Activities, Crafts, Elementary, Pre-School, Recycled, Toddler Tagged With: paper, paper making, recipe, sensory

5 Easy Steps to Invent a Recipe with Kids

By Rachelle 36 Comments

Cooking with Kids to Invent a Recipe

Cooking with Kids to Invent a Recipe

Do you like to cooking with kids or do you yearn to cook with your child? Today we’re sharing five easy steps to invent a recipe with kids, which will get you into a creative cooking mindset. Think Master Chef + little kids = a fun afternoon.

But you might wonder, “why would I want to invent a recipe when I can easily follow a recipe?” The answer is that inventing recipes instills children with confidence to invent their own solutions to a problem, encourages independent thinking and problem solving skills, and teaches children how to find their way around a kitchen.

My house smells like pancakes.

Which really means that it smells like cooking oil and caramelized sugar. Sort of a happy, greasy smell that has lingered for days.

Every afternoon, for the past three days, my 3 year old turns into a kitchen alchemist as she gathers ingredients and invents her own recipes.

She is in heaven. And it gets even better once we cook the cakes up and proudly serve them up to hungry family members.

Do you ever give your kids free reign over your kitchen?

Experiments like this set children up with a real-life science experiment that fosters creativity, inventiveness, and problem-solving skills. It’s not for the faint of heart and you have to be okay with a bit of a mess, but I think the trouble is well worth it for the amount of creative confidence it builds in children.

So, after three straight days of wild pancake combinations, I present five lessons learned on how to invent recipes with kids…

Cooking with Kids: Invent a Recipe

How to Invent a Recipe with Kids | TinkerLab

Lesson #1…Get Familiar with the Kitchen.

If your child doesn’t know where things are, give him a little tour. And start with a simple cooking project that introduces him to some key ingredients and tools for a favorite recipe (such as a mixing bowl, mixing spoon, measuring spoon/cup, flour, and oil).

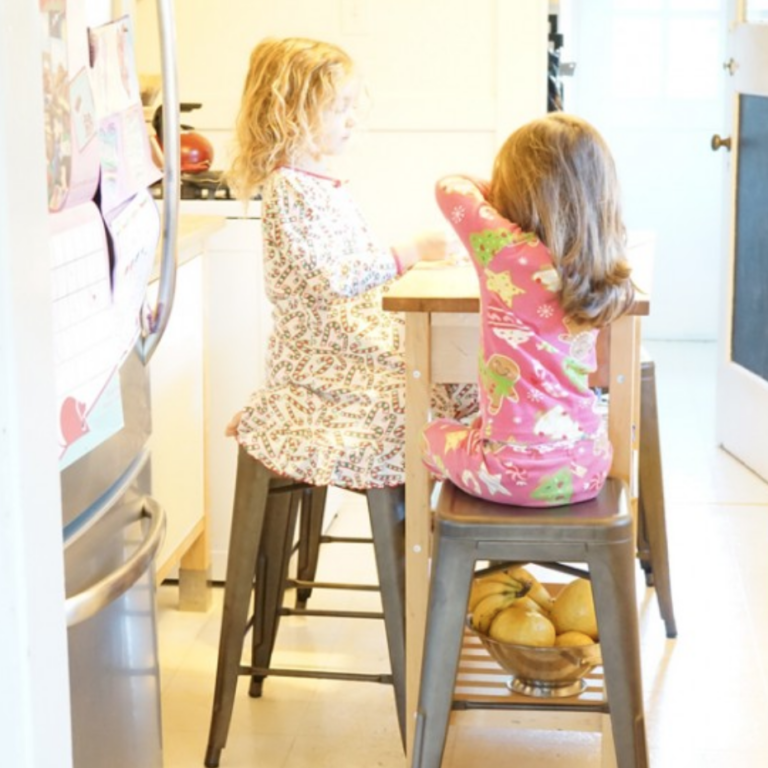
We spend a lot of time cooking together and my oldest (N) knows her way around the kitchen. She can find the biggest mixing bowl in the house, all the baking ingredients are at kid-level (this will no doubt pose a problem once her little sister figures this out), and we have amazing little foldable step stools like these that give her access to the fridge (unless she wants the butter…but we do have a taller stool for that).

How to Invent a Recipe with Kids | TinkerLab

Lesson #2…Come up with a General Plan.

In our case, N has been making pancakes, pancakes, and more pancakes. We tend to make a lot of pancakes in our house anyway (they’re not just for the weekends), so she’s super-familiar with the key ingredients and general direction of what might taste good together. For example, she didn’t pour ketchup into the batter (although if she did, I probably would have let it happen).

Do you have a favorite family recipe that you could riff off of? 

To start, she collected a few ingredients (white flour, wheat flour, flax seeds, and blueberries), and added them to the bowl. I tried to step back and allow her to make decisions about quantities, but every now and then I’d throw out a suggestion to help guide the journey.

As you can imagine, her pancake recipe has WAY more than the usual tablespoon of sugar (see the next picture), but it turns out that sugary pancakes are absolutely delicious.

invent a recipe with kids

Lesson #3…Green Light all Ingredients.

Of course you want to be safe about this, as things like raw meat and raw eggs need special handling, but try to keep an open mind as your child selects her ingredients. One of N’s batters had chocolate chips, white chocolate chips, mango juice, dried cranberries and walnuts in it. It was amazing.

The most recent batch contained raspberries, strawberry cream cheese, diced apples, and goat cheese. It was a bit chunky, and I’m not so sure about the goat cheese, but we drafted a recipe in case they end up being the best one yet.

Which bring me to the next lesson…

How to Invent a Recipe with Kids | TinkerLab

Lesson #4…Write the Recipe Down.

This is validating and makes the whole game so much more fun. As N added ingredients, I tried my best to write them down. Some things were carefully measured and others weren’t, but it didn’t really matter. I’m thrilled to have documentation of her first recipes and I’m sure she’ll treasure them as she gets older.

How to Invent a Recipe with Kids | TinkerLab

Lesson #5…Embrace a Good Experiment.

As we cooked, I repeated multiple times that this is a grand experiment and that we’d be surprised one way or the other. We chatted about how it’s possible that not one person has ever made this exact recipe, and that chefs go through a similar process when they invent something new. Like scientists, they hypothesize (what ingredients might taste good together?), they experiment (let’s make this batter with yogurt and the next with sour cream), and they test (how does it taste? which batch do we like better? why?).

How to Invent a Recipe with Kids | TinkerLab

After one of our cooking sessions, my husband took the kids off on a run in the stroller. These two hot cakes were eaten before they left the driveway, which I suppose speaks to how delicious they came out.

5 easy steps to invent a recipe with kids | TinkerLab

Filed Under: Activities Tagged With: kids, kitchen, preschool, recipe, science

Next Page »

Copyright © 2019 - TinkerLab ® - All Rights Reserved